In this video lesson, I’m going to teach you how Xenioo provides everything you need to make any sort of chatbot API calls to any external services.
A chatbot, as you may have seen from previous lessons, often provides static information to users. For static information, I mean that every piece of data provided by the chatbot as a response to any user question or searching is totally built-in inside the chatbot itself.
But how can you manage a common scenario where your chatbot needs to provide dynamic data, based on chat context and user queries? Think something like pulling data from Customer Relationship Management (CRM) or e-commerce product database and so on.
For example, what if your hotel chatbot needs to check the availability of rooms? What if your shopping chatbot has to check if a pair of shoes is available in some size and color before finalizing the purchase? All these data, being dynamic and subject to changes over time, must be requested in real-time from the platforms in which they live.
How to make a chatbot API call?
The good news is that Xenioo, as usual, provides the perfect tool to integrate the chatbot with external systems and services by allowing standard web requests and being able to further processing their corresponding responses.
The requests you can send to these services can be of different types. You can retrieve some data, or you can update or delete them, depending on the current flow and context.
The magic is possible thanks to a Xenioo action named Call API Service Action.
This action can be used, at any point of your flow, to call any external HTTP or HTTPS Web API services using different methods. The full result can be assigned to a variable that could later be worked out.
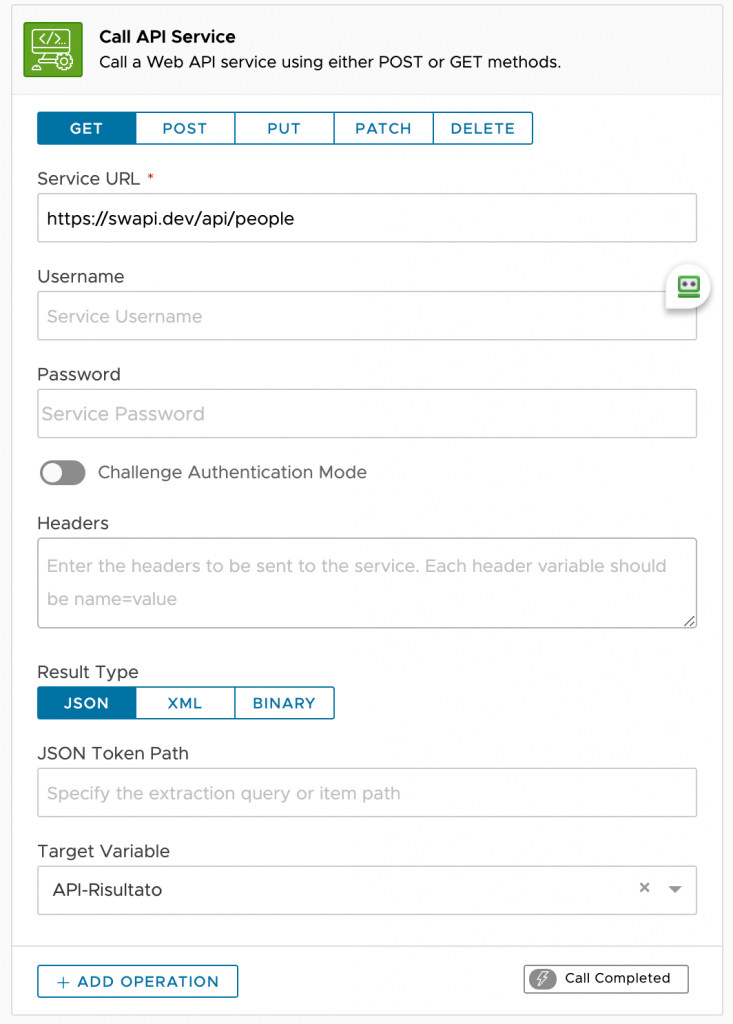
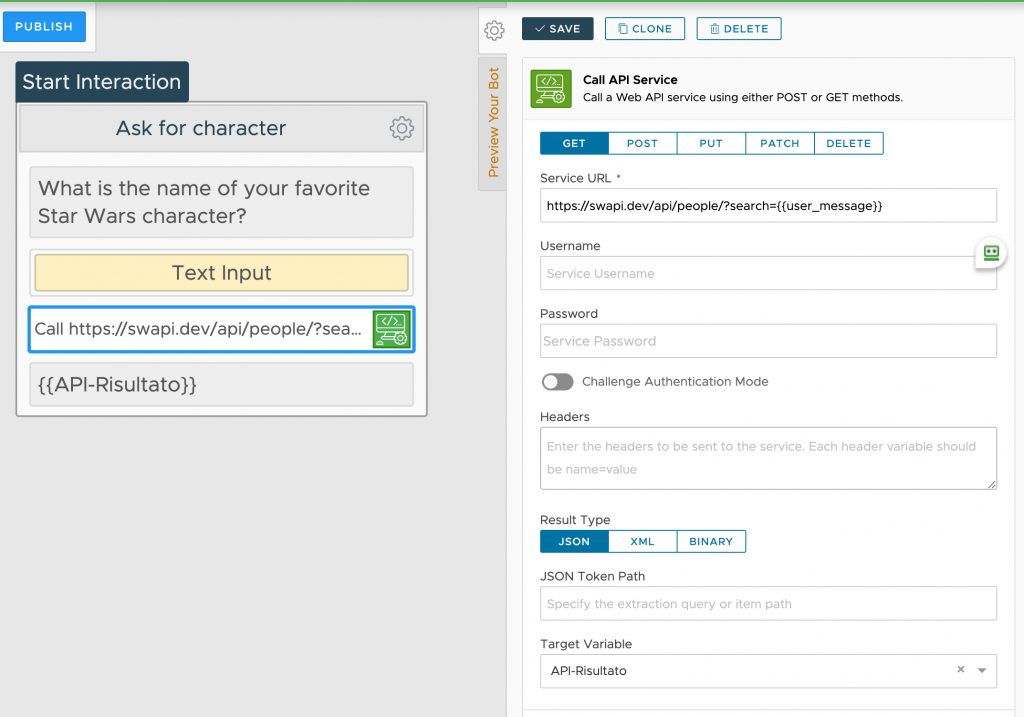
In the image below, you can see the configuration of the Call API Service action.
There are many parameters that you can configure, making this action very flexible and adaptable to an infinite number of integrations.
This action configuration requires you to have minimal technical skills, enough to understand what is an API and how to invoke it. However, public services exposing API have usually rich guides or online help that make it easy to figure out how to call them.
The first thing to set is the HTTP Verb. Usually, the verb in HTTP APIs describes the type of operations that are being requested. Often they correspond to read, create, update and delete methods, but it’s not mandatory and every service might have its own implementation.
The Service URL (2) is simply the URL of the service to be invoked.
Username (3): the username to be used to authenticate to the service (if required).
Password (4): the password to be used to authenticate to the service (if required).
Challenge Authentication Mode (5): if enabled, the service will be called by using Username and Password as standard Network Credentials.
Headers (6): headers to be sent with the request. One header on each line in a name=value format.
Result Type (7): choose if the service is replying with JSON, XML, or BINARY content. Xenioo variables can take any string-based content. If you choose to access a service that replies in binary content (like a service that replies with a pdf file or an image) choose BINARY format as result. In that case, Xenioo will automatically create a file with the result content inside your account storage and return the full filename URL inside the target variable.
JSON Token Path (8): the full property path of the value to extract from the JSON response.
Target Variable (9): the name of the variable that will take the response received from the server.
Use chatbot API calls to query data
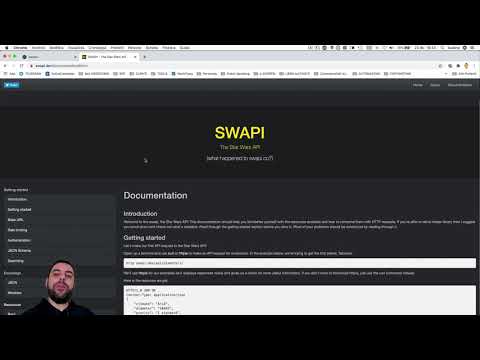
To figure out how chatbot API calls works, I’ve prepared an example using the free
Star Wars API.
Let’s create an interaction with a text message, the Call API action, and a final text message containing the value of “API-Risultato” which is our Target Variable.
Let’s make a first API request to the Star Wars API! The first thing I need is the
base URL which will be the root of our every call:
https://swapi.dev/api/. As this is a completely open API, no authentication is required to query and get data. Unfortunately, this also means that I’m limited to just
GET-ing the data and I won’t be able to create new resources there.
The goal of this API call is to search for Star Wars characters, so I will use the “people” resource which corresponds to a person or character within the Star Wars universe.
Now I have all the elements I need to compose the Service URL which will then be composed of the base URL (https://swapi.dev/api/) and the resource (people): https://swapi.dev/api/people.
Finally, I have to set the Target Variable to a variable named “API-Result”.
To test this example, I’ve sent this Behaviour to my WhatsApp number.
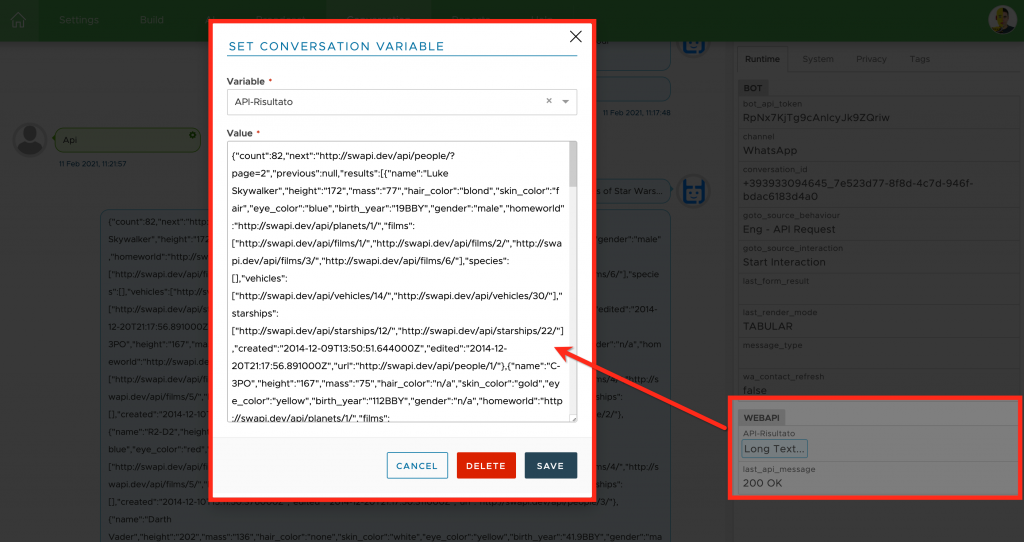
Here’s what happened:
As you can see, I’ve checked the result of the API call just by looking at the variable I’ve chosen to save the response. The API response contains the total of records found and details of each character found such as name, height, weight, hair color, and so on.
Let’s make things even more interesting by making a specific request for a certain character. The API resources we’re using support a search parameter that filters out the set of resources returned. This allows me to make queries like:
https://swapi.dev/api/people/?search=r2
So, let’s replace the Service URL with the latter and test the Behaviour again.
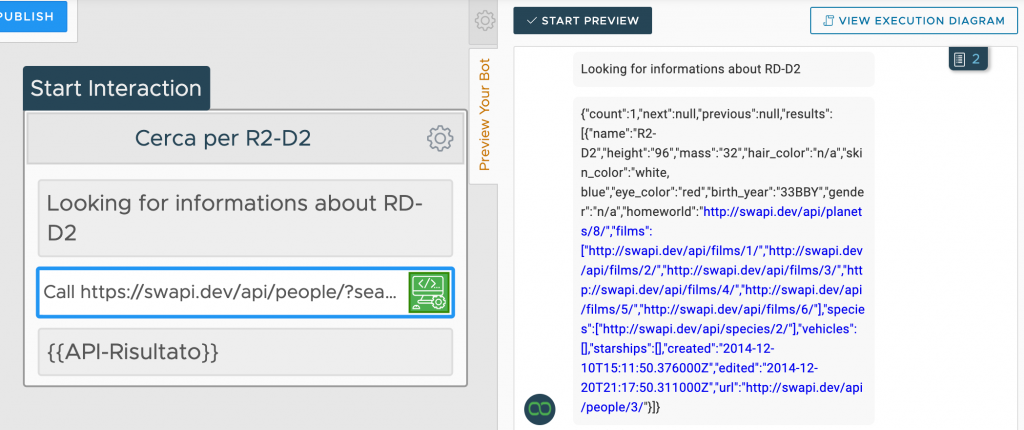
As you can see from the preview on the right, this time we get a different response, which contains only one record as expected.
How to extract data from API Call response
In the next example, I’m going to show how it is easy to extract single information from an API call JSON response.
This time the chatbot is going to ask the user: “What is the name of your favorite character?” so that the user answer is used to compose the search criteria for the chatbot API call.
Let’s look at the following interaction:
Launching the preview and answering “Luke”, I’ve got the same result as before, but this time I’ve used a variable received from the user for my search criteria.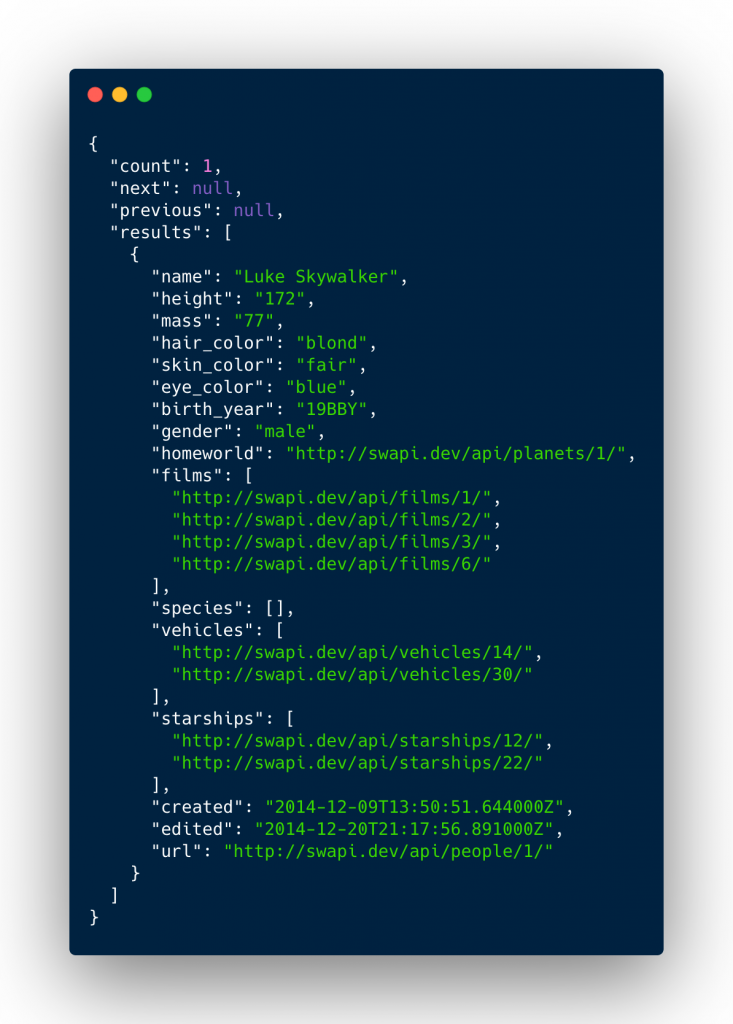
This result is good and pretty explanatory, but it’s unuseful as it is. I would like to extract a single value, like the full name or hair color. How can it be possible without losing minds with weird code scripts?
Well, Xenioo helps even in this case.
Xenioo dynamic parsing fully supports real-time JSON parsing. Object properties and indexes can be specified using standard property notation to access complex values.
So let’s assume I want to access only Luke Skywalker’s “name” value, which is contained in the “results” object of the response received from the API. Easy peasy!
It will be sufficient to indicate the name of the target variable, that is {{API-Risultato}} specifying the “results” container and its “name” field value, through this notation:
{{API-Risultato.results[0].name}}
I’ve started the preview to check if dynamic parsing worked as expected.

As you can see, the last message displays exactly the punctual values as it was extracted from the JSON response. No coding hell at all, just simple notations:
 name: {{API-Risultato.results[0].name}}
height: {{API-Risultato.results[0].height}} cm
weight {{API-Risultato.results[0].mass}} kg
hair colour {{API-Risultato.results[0].hair_color}}
eye colour: {{API-Risultato.results[0].eye_color}}
A little tip: not only you can identify specific values thanks to the path of the fields that contain them, but you can also store this information inside Xenioo variables for future reuse.
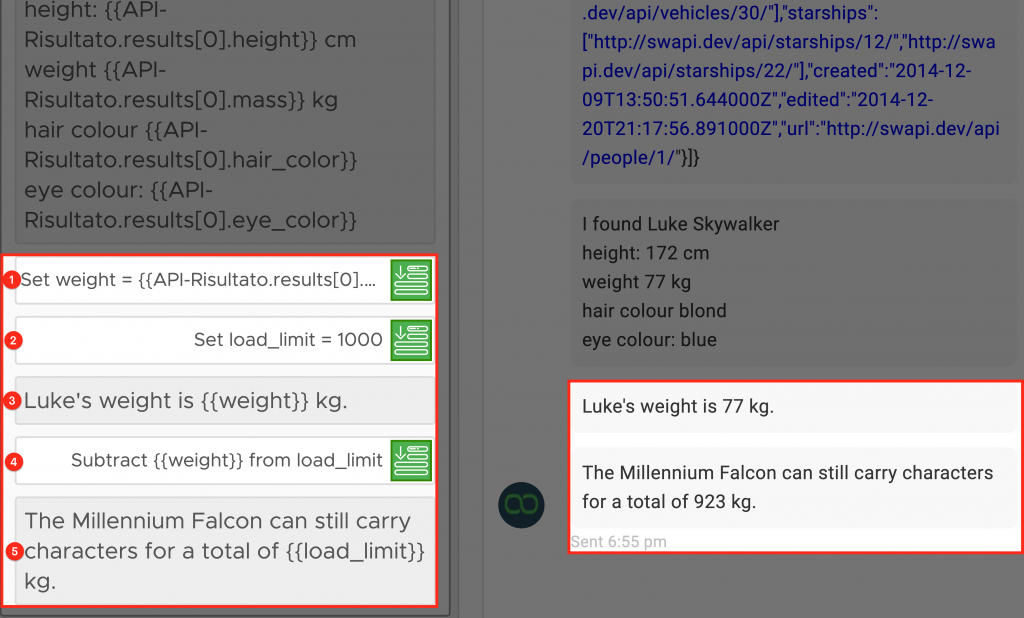
In the example above, I’ve set the weight‘s value to {{API-Risultato.results[0].mass}} (1) and load_limit‘s to 1000 (2), then I’ve printed out weight value (3) just to confirm the value is passed.
Then I’ve subtracted (4) weight value from load_limit so that the calculation would be (1000 – 77). Finally, I was able to display (5) the new value of load_limit.
To Sum Things Up…
As you have seen, it is very simple to interact with external services. Thanks to Xenioo and its advanced features, you can create dynamic chatbots that really communicate with your customer’s backend systems.