

In my previous post, we have been talking about how to integrate Zapier with Xenioo and it was fairly easy: creating a chatbot being able to communicate with external systems, being raw JSON or specifically tailored integration, is the starting point of any tool that calls itself serious.
This time we’re going back to Zapier but with a twist: it will be in reverse. We want to be Zapier to control our chatbot.
What we want to archive in this article can be summarized in these points:
- We have a google sheet with a list of orders
- Each order line has an email, that connects an order to a user
- Each line has a parcel tracking id
- Each order line has a status column
- When we process orders, we move the row from Pending to Ready
- When this happens, we want our chatbot to send a message to our user, telling that the order is ready together with a tracking number.
Sounds good? Good. Keep reading then because we’re going to see all the steps.
Keep in mind, we’re using Zapier because it easy to setup and works very well, but you can swap it with anything you like or you are already using (like your own back-end, for example).
Setting up the Google Sheet
This is of course the easiest part. All you need to do is create a Google sheet with all the columns you would like to use for your orders. In my example I’ve setup only the very basic ones: the user email (that you can easily collect from your chatbot and already synchronize), the item ordered, a price, our tracking id and the order status.
The two column we’re going to really use are the tracking id and the item description. Ideally, as the order is shipped and becomes ready, we want the user to receive a nice message on his messenger with all the details.
Once you’ve created your own sheet, we’re ready for the next step.
Creating the Xenioo Broadcast
What we need from our chatbot is a Web-hook: some kind of HTTP URL that can accept data, work with it if necessary and then push it to our users. This can be done by using a very specific type of Xenioo Broadcast: the On-Demand Broadcast.
This type of broadcast has no automatic scheduling and will just generate an API endpoint that you can call externally. In the image below you see where the webhook URL is displayed: treasure this data as we are going

We will leave the broadcast like this for now: we are going back to designing the interaction later. For now, let’s just copy the webhook url that Xenioo has generated for us.
Creating the Zap
Zap are how tasks are called by Zapier. The first step of our Zap will be the connection to the Google sheet we’ve just created. There is a nice wizard that will guide you step by step trough all the process but just remember that we want our task to trigger when the order status changes so we need to make sure that the Status column is configured as ‘Trigger Column’.
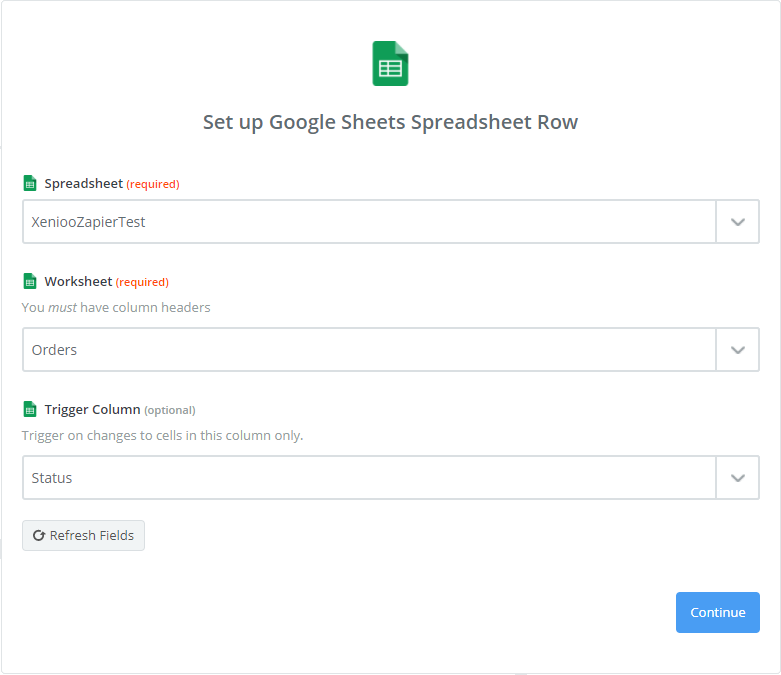
Once you’ve confirmed all of the parameters for this step, we can create the second one: a webhook POST action. We’ve kept our broadcast webhook URL handy and we are now pasting it in the URL parameter of this step.
Sending the data to Xenioo
A very powerful feature of the OnDemand Broadcast endpoint is that it is accepting a flexible payload that will be sent to our chatbot.
The payload may contain specific fields, filters and values that can drive the broadcast and our chatbot behavior. You can see below how we can configure the data that our Zap will be sending.
Here is a breakdown of the parameters we are sending.
| audience_filters | This is the list of the variables we are going to filter for our audience. In our example we have only one filter for user_email. If you need more filters, just split them using a ‘;’ |
| audience_filters | These are the criteria Xenioo should use to build the audience. Here we are sending only ‘equals’ but we can use one for each field. |
| audience_values | These are the values we are using for each of our filter fields. Our key in the example is the email column. |
With these three fields, we are instructing Xenioo to bypass any Audience the broadcast might have.
We are driving the Audience directly from our webhook and we are asking Xenioo to target the broadcast only to users where user_mail equals user_3@xenioo.com.
Since in our example each user has a different email we are conveniently creating a broadcast that is sent only to one user: the one who has made the order. You can change and configure more filters as you need them: there’s no limit to the number of audience filters you can create.
The next set of fields instead, is pushing named variables directly to the chatbot runtime.
| set_variables | This is a list of all the variable names we are going to push to the chatbot. As you see, we’re specifying multiple variables by using a ‘;’. |
| set_variables_values | These are the values of the variables we are pushing. As you can see, in our example we are taking them directly from the Google sheet. |
What we are doing here is sending variable name and value pairs and “injecting” them to the receiving chatbot instance. These variables will be available to our chatbot during design mode and of course, run-time.
Back to Xenioo
Now we are ready to go back to Xenioo and complete our broadcast by designing the interactions we are going to broadcast. In the previous step, we’ve detailed which variables are going to be sent trough our webhook and now, of course, we are going to use them:
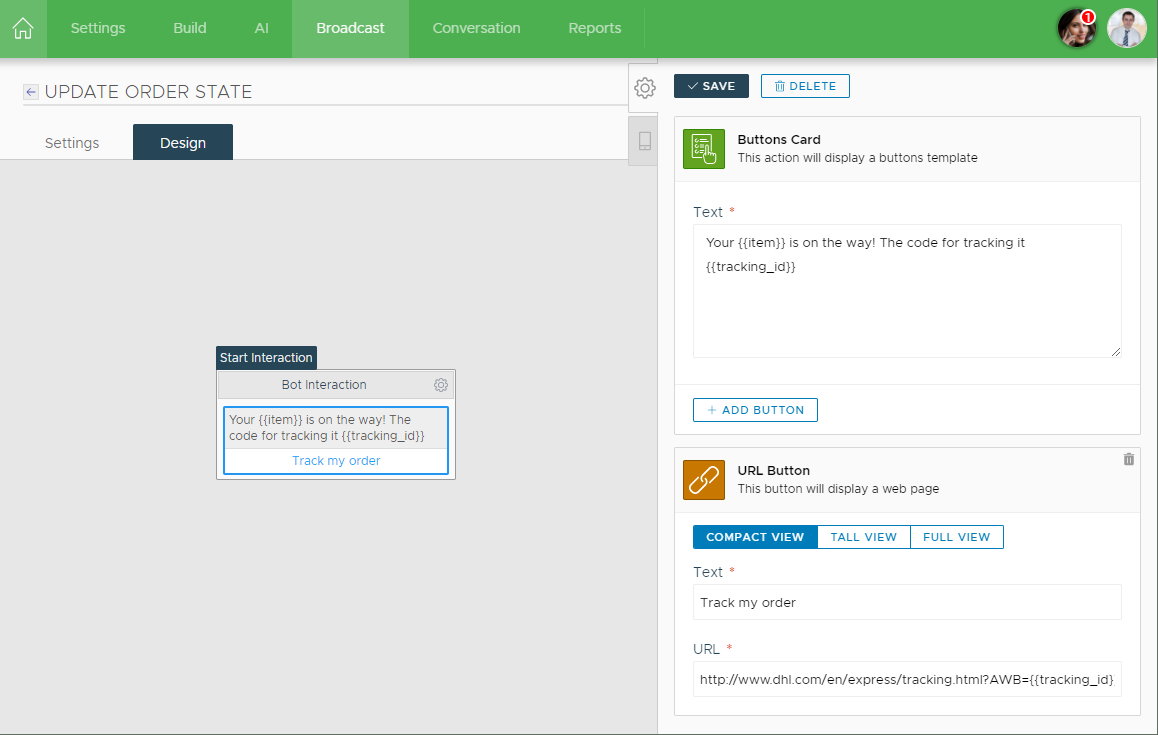
Our behavior is going to be very quick and simple: we alert the user that the order is on the way and since we also receive the tracking id, we are so kind to display an URL button with a full tracking pointing to our tracking website.
In our
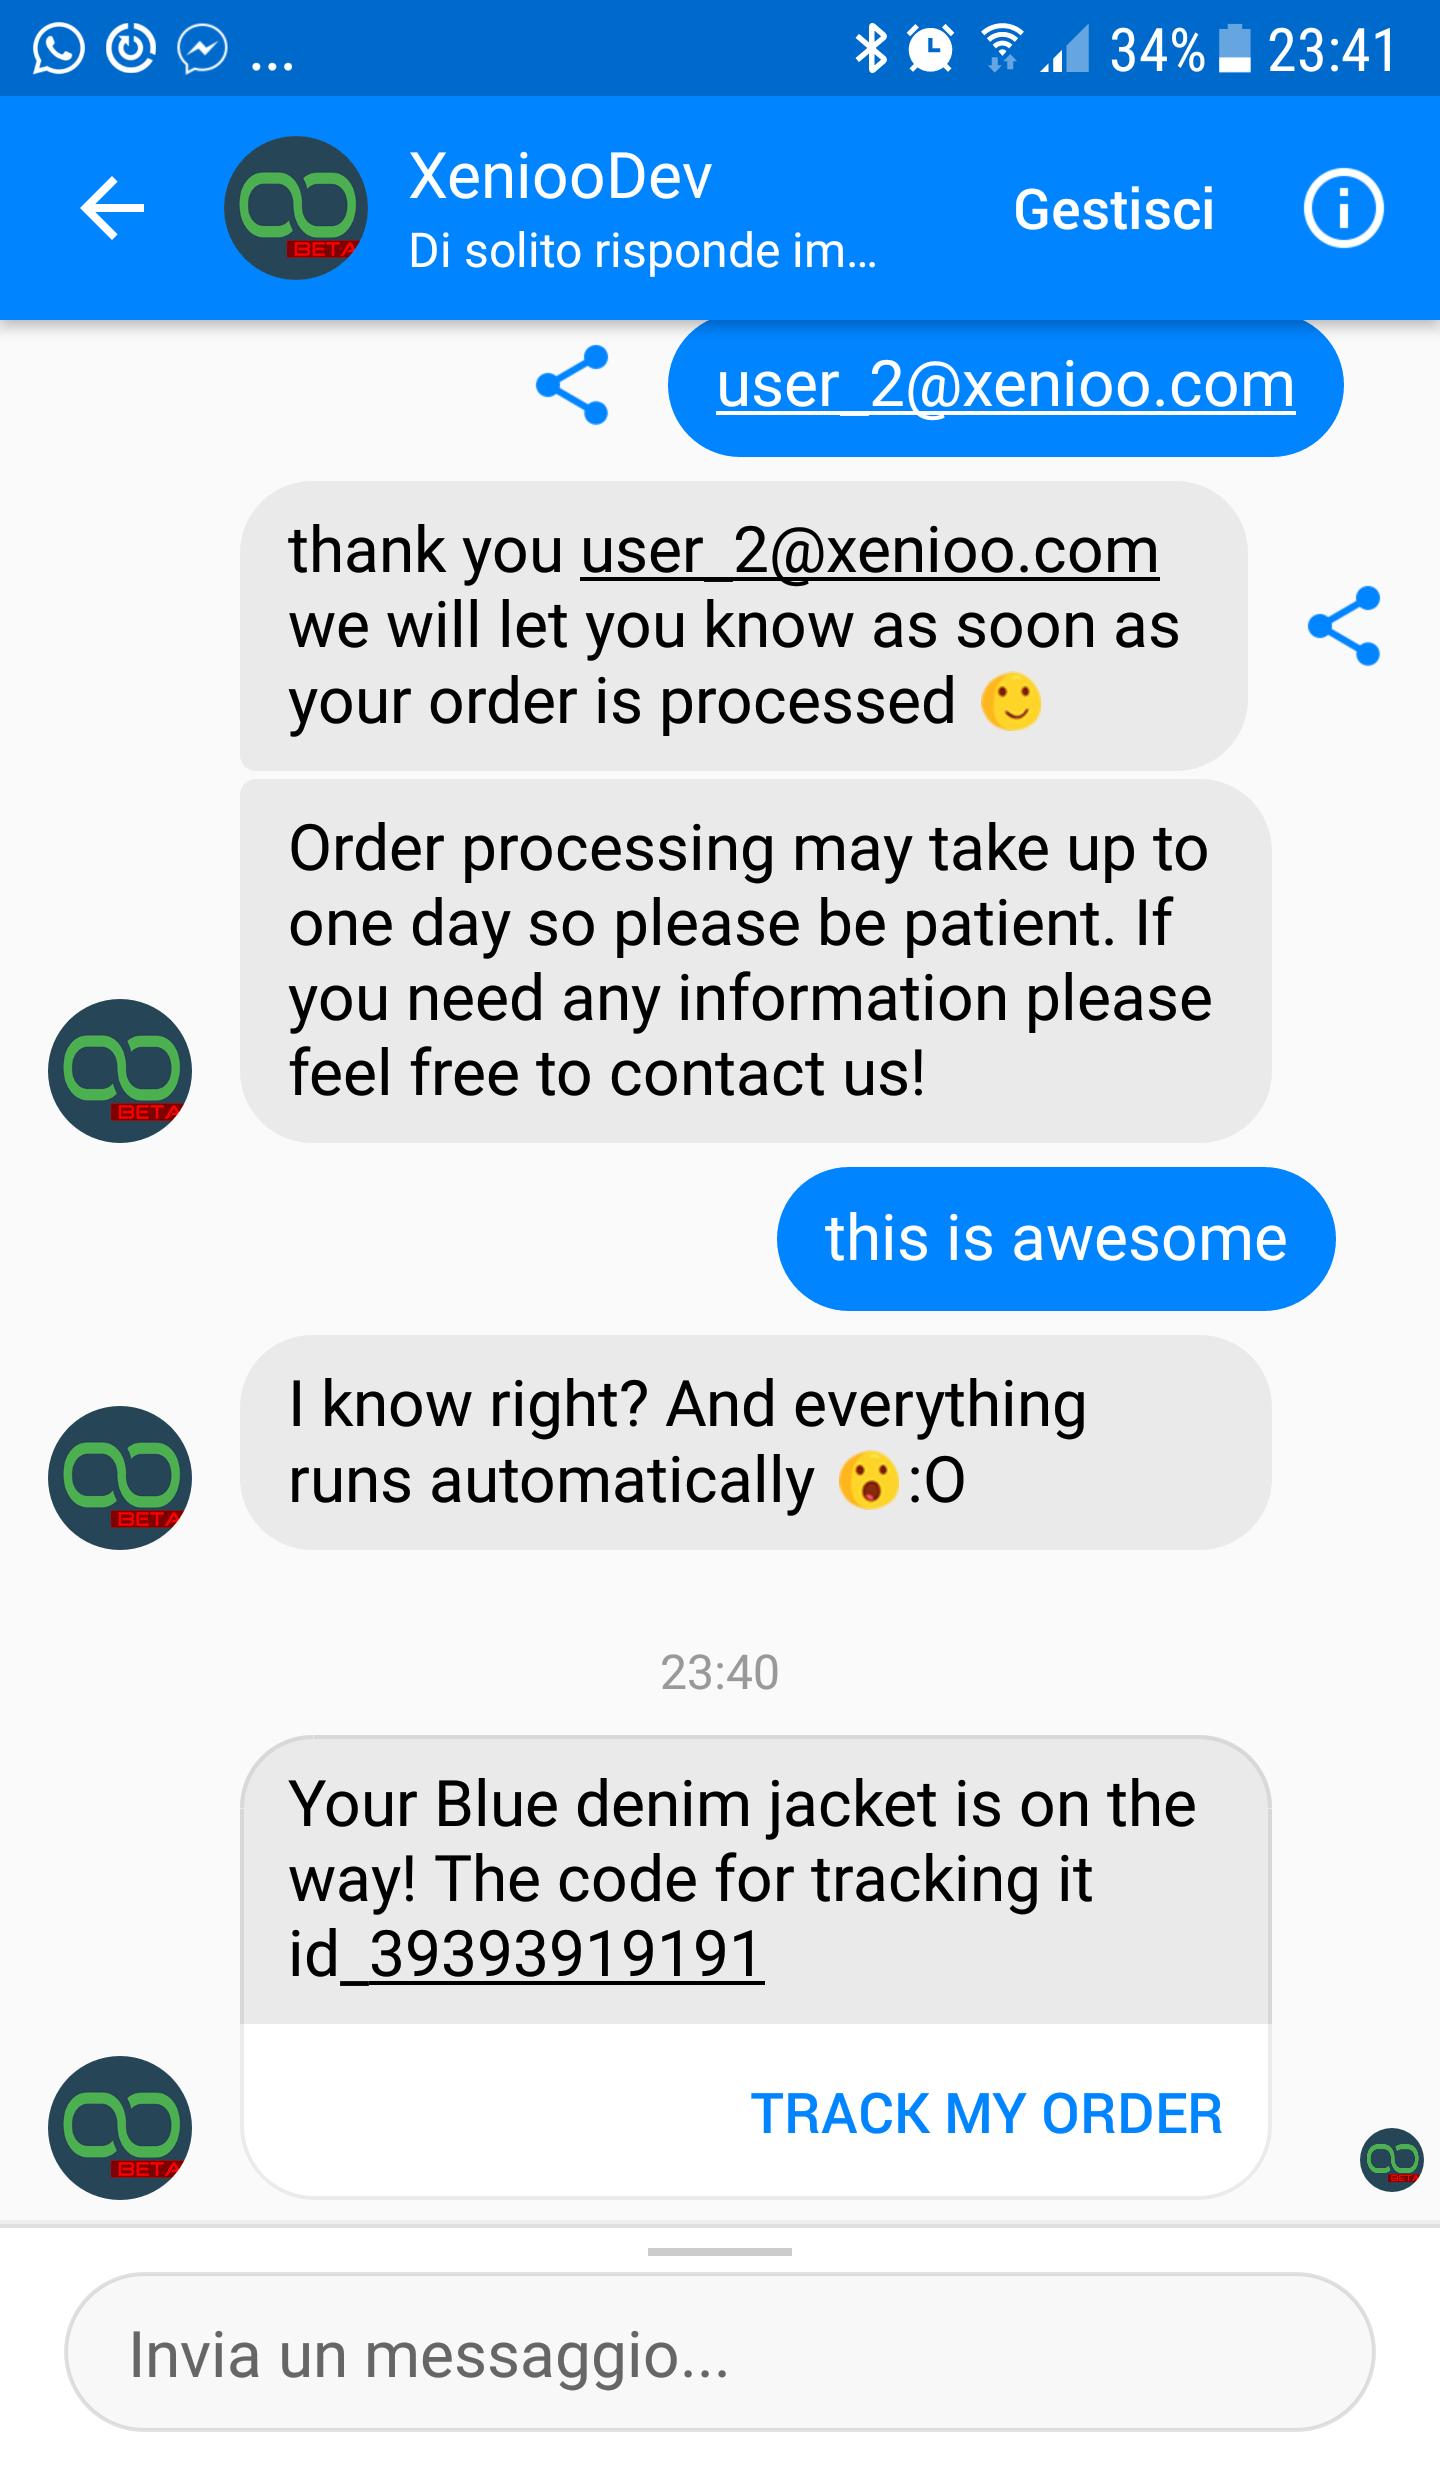
Showtime
Everything is set and ready. All we need to do now is publish our bot and see it working!
For our example, we attached our chatbot to one of our Facebook test pages and quickly configured it trough an e-mail input with user_2@xenioo.com.
After that, we just left it there and went to our Google sheet to update the corresponding row. We are writing that the order is ready and adding a random tracking id.
We need a little bit of patience here as while Xenioo OnDemand broadcast
Just wait for a little and voila! The user receives a broadcast wherever he/she is: the order is ready and it’s on the way.
We can also click on the Track My Order button to switch to a web-view of our selected tracking provider (who of course don’t know anything about our bogus tracking id).
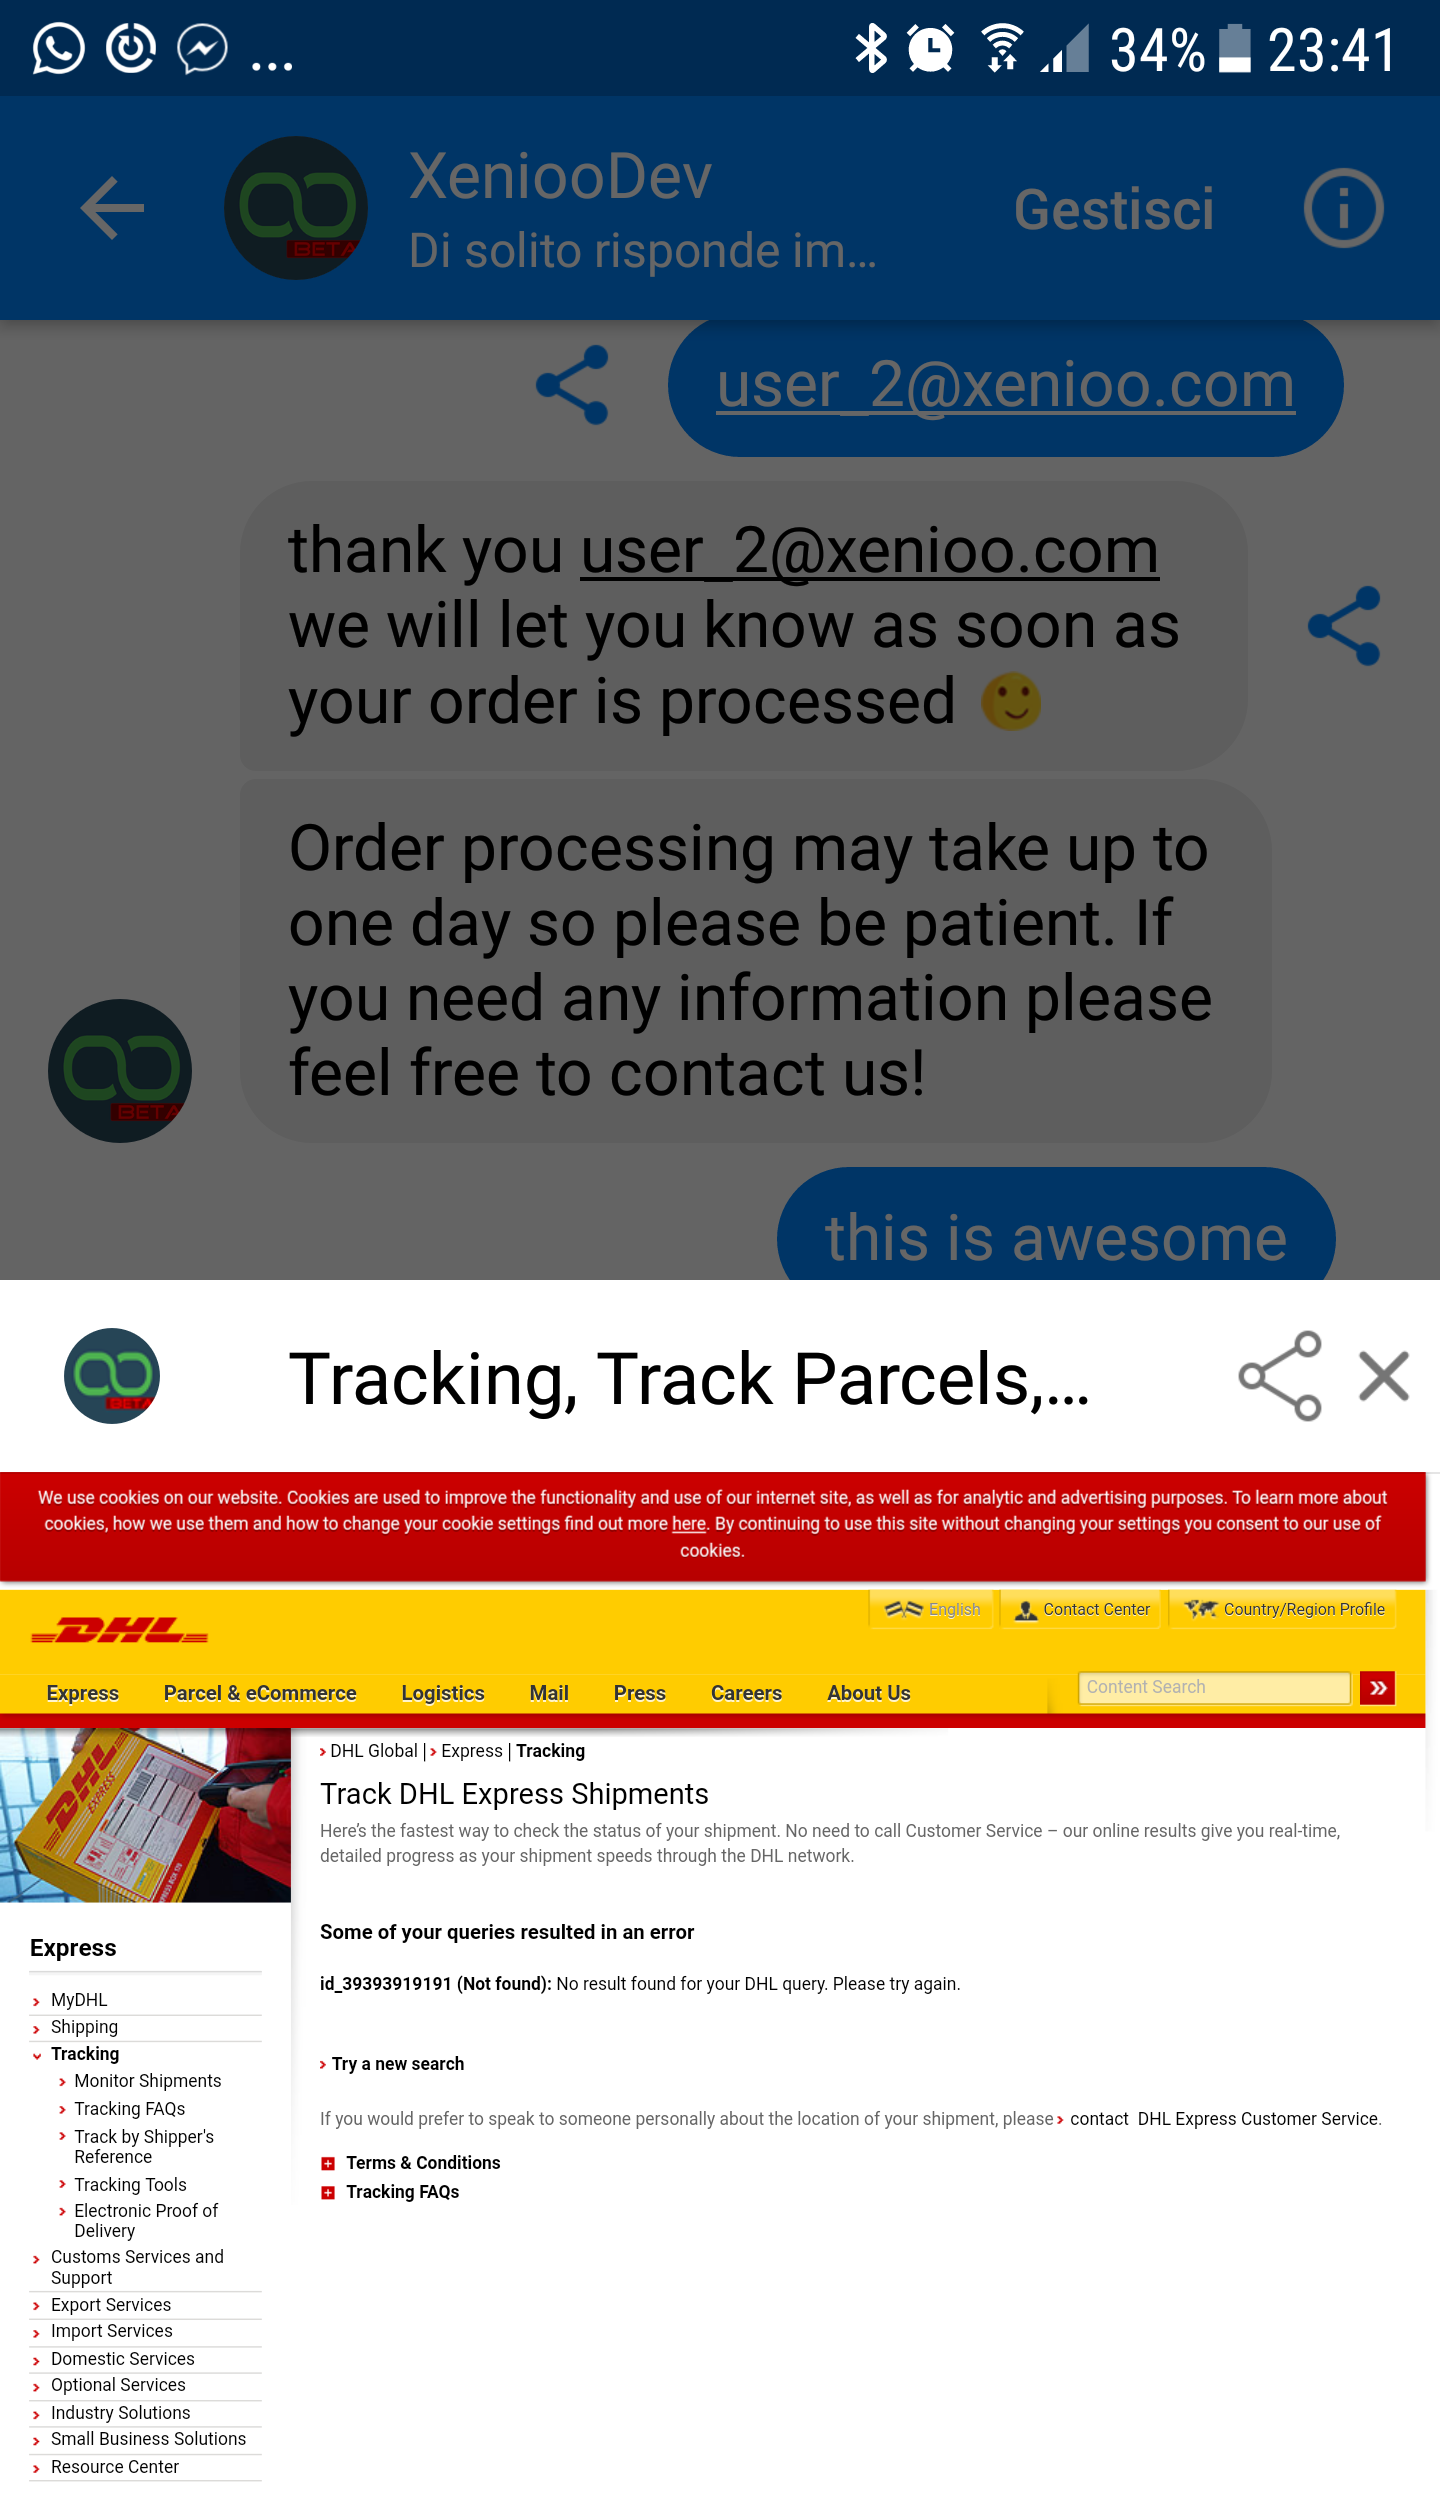
Awesome isn’t it? We have just created a perfectly functional backend system that could manage your shop orders with no coding at all and we’ve only started to scratch the surface of what Xenioo can do.
In my next