Together with DialogFlow, IBM Watson Assistant is one of the biggest names in online natural language processing design.
Today we’re going to see how we can quickly and seamlessly integrate it using specifically designed Xenioo Actions.

Choosing Xenioo Actions
The first thing to do when processing an input is choosing the right action. Xenioo input actions are split into two categories: Inputs and Detections.
Inputs are actions that will hold the conversation until the user correctly answers while Detections are general triggers that may be fired anywhere during an interaction, a behavior or globally, at bot level.

It is a fundamental differentiation as it changes dramatically the way your bot behaves. Inputs are usually made with direct questions that need to be answered to proceed.
Something like “What is your phone number?” or “How many people will be attending?” and so on. Those are fundamental variables of your process.
On the other hand, Detections may be triggered by general questions that can be answered anywhere in your chatbot. They may include general chit-chat questions (what is your name? are you a chatbot?) as well as user details information that needs to be available anywhere like “I need to change my reservation”.
In our example, we’re picking an IBM Watson Assistant Input Action.
Integration Parameters
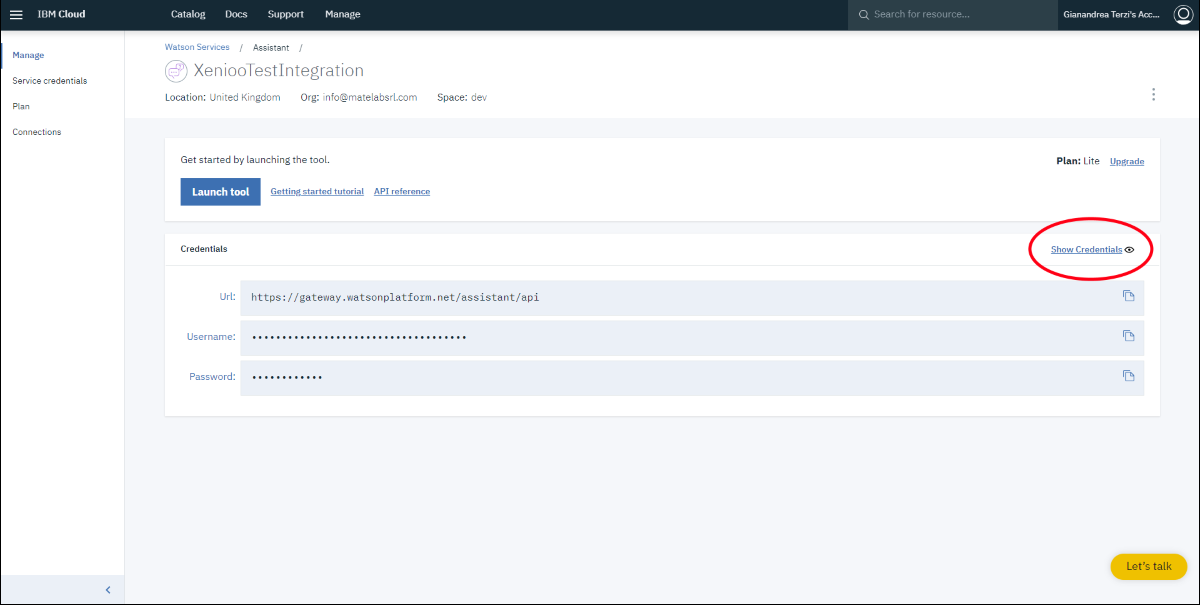
To link our Xenioo chatbot to IBM Watson Assistant we need a couple of parameters that can be quickly copied and pasted. The first two are username and password: you can find both in the Assistant section of your Watson Services page.
Just click on the Show Credentials button and copy/paste them to Xenioo integration interface.

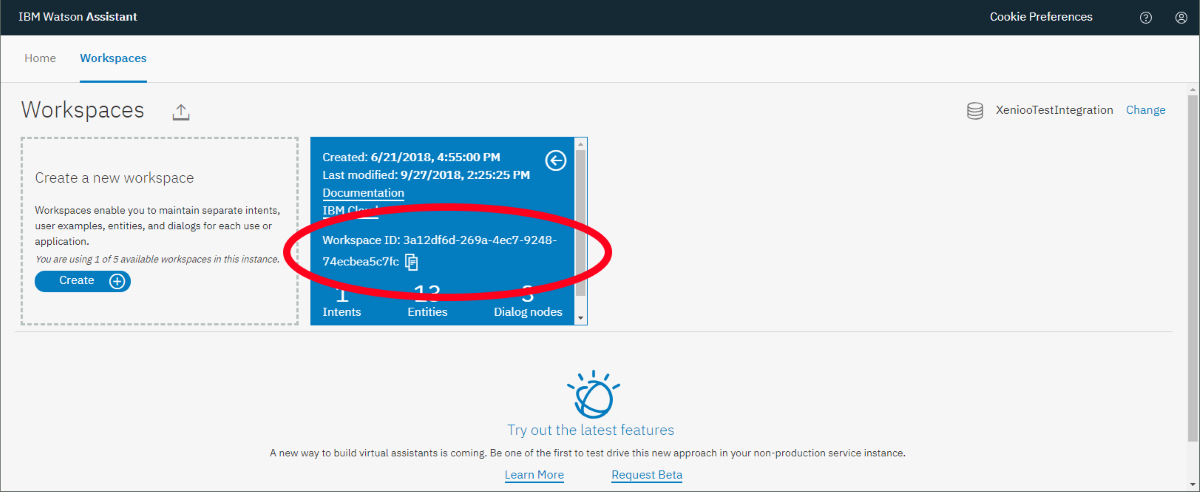
After this, we only need the Workspace Id. Inside your IBM Watson Assistant interface, you have one or more Workspaces: intents detection is based on a specific Workspace with a specific Unique ID.
To get your Workspace Unique ID, click on the three small dots that you see near your Workspace name and then click on “View Details”. The Workspace card should flip and display, among other things, the ID you need. A handy icon can be used to quickly copy the value: once done, paste it to the corresponding field in Xenioo.

Using Intents
With our integration parameters saved, we are now ready to proceed: all there is to do is specify the intent we want to catch.
You can either type it directly or copy/paste it from
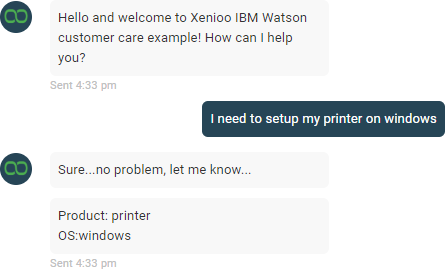
After doing this last step, we’re ready to test our chatbot: let’s click on the preview button to run it and see how our integration works out.

The answer you get immediately after intent detection is retrieved from IBM Watson. This is optional and completely up to you: you can either define replies in Xenioo interactions or have Xenioo retrieve them from IBM Watson for you.
Each Entity you define inside IBM Watson Workspace which is detected in
This is a huge feature as it allows you to further manage your chatbot flow based on the user detected information.
As with all Xenioo Actions, everything can be checked and debugged through our Execution Diagram Interface. From there you’ll see how intents are detected and with what score and see how different variables are affecting your flow.
“The Right Tool For The Job”
I originally intended this post to end with something like use Xenioo when this, or
The truth is that, with Xenioo, you don’t really have to pick a side: the smooth integration that is smartly managed by the Xenioo engine make it so that you can create intents with each platform and pick whats the best tool depending on the job.
I wouldn’t be surprised to see chatbots using all of the engines simultaneously depending on the language or the question!

