

Customer service is important for every company and a customer support chatbot is the ideal tool for effectively manage it. In fact, it turns out that 90% of Americans use customer service as a factor to decide whether they should do business with you.
But especially in these COVID work-at-home times, it becomes harder to manage a customer service team.
So, that’s why I will show you how can use a Xenioo chatbot to manage a distributed support team.

Inviting and adding your team members
Before we can actually manage a distributed support team, we first need to make one.
Let’s start by creating our support team in Xenioo by inviting our team members.
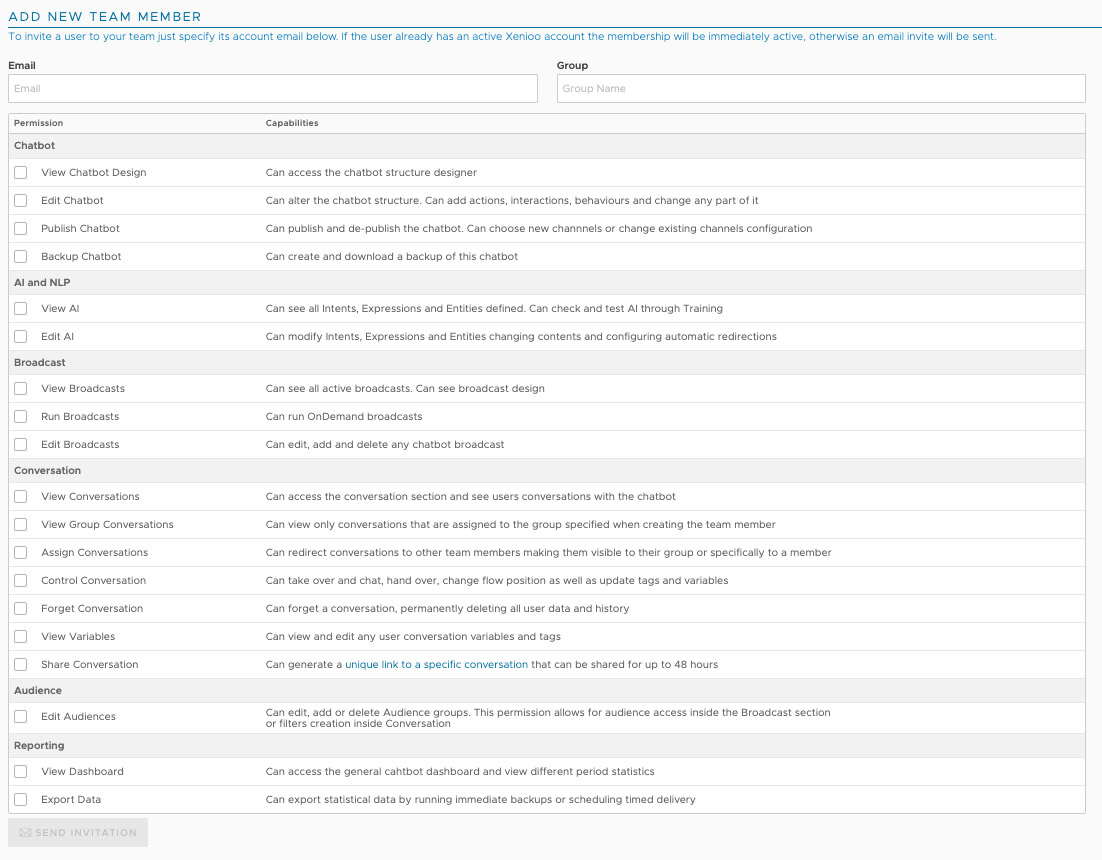
You can do this by signing in to your Xenioo account, go to one of your chatbots and click on Settings → Team.
Here, you can fill in the email of the team members, the group they belong to (for example, ‘Sales’ or ‘Support’) and the permission they have:
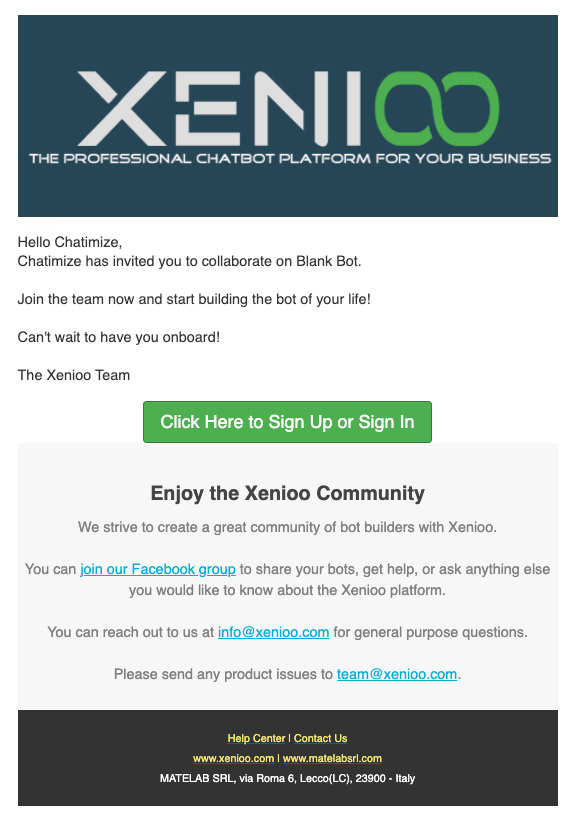
Once you click on Send invitation, your team members will automatically get an email from Xenioo:
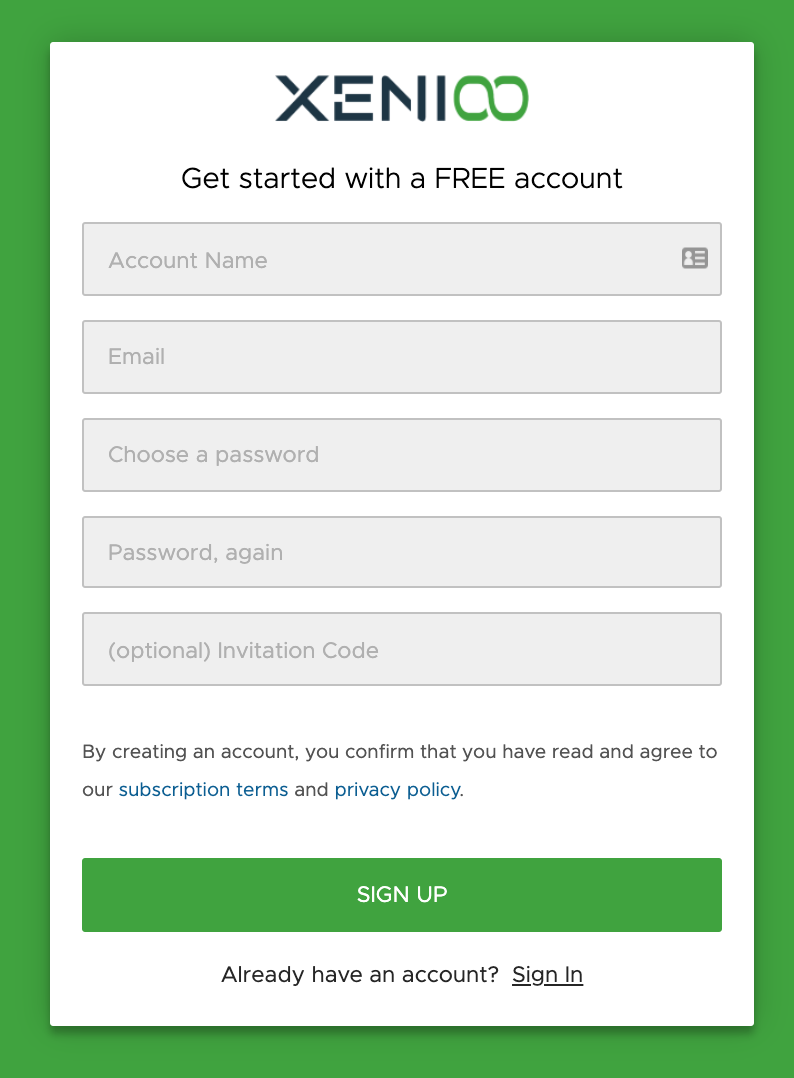
And when they click on Click here to Sign Up or Sign in, they will first need to create an account:
If they made an account, they need to confirm their email (otherwise they won’t show up as “Active” team members):

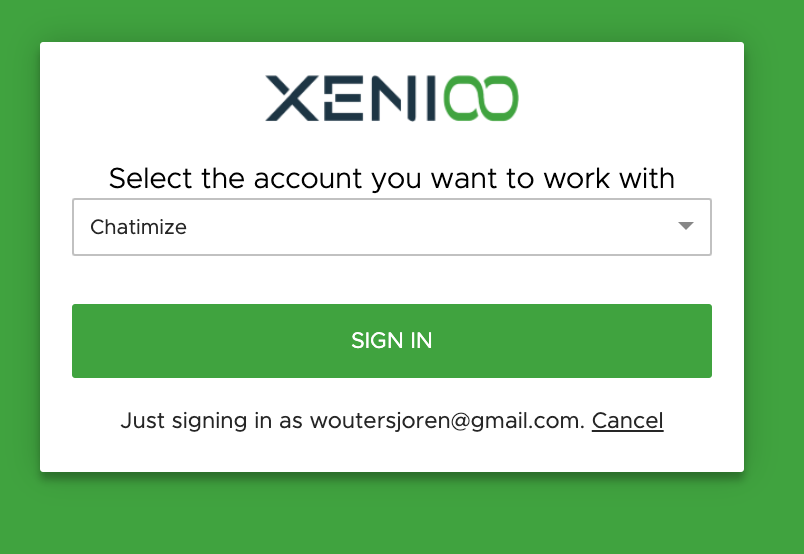
Eventually, when they log in, they need to select the account they want to work with:
When they have performed all these steps, they will show up as Active members in Xenioo:

Great! Now you got your own team in Xenioo to handle support queries.
Let’s move further.
Setting up your fallback message
Now we’ve got a team that can handle your support queries, but when are we going to handle them?
This is where the fallback message comes into play.
The fallback message is the message that shows up when your customer support chatbot doesn’t know an answer to a question.
It is not a problem when the chatbot doesn’t know the answer to a question. But it becomes a problem when you are hanging the user out to dry.
So, we need to make sure that the user has a great experience with your chatbot.
But how can you do this?
By handing over the conversation to a human, who ensures the user has a great experience.
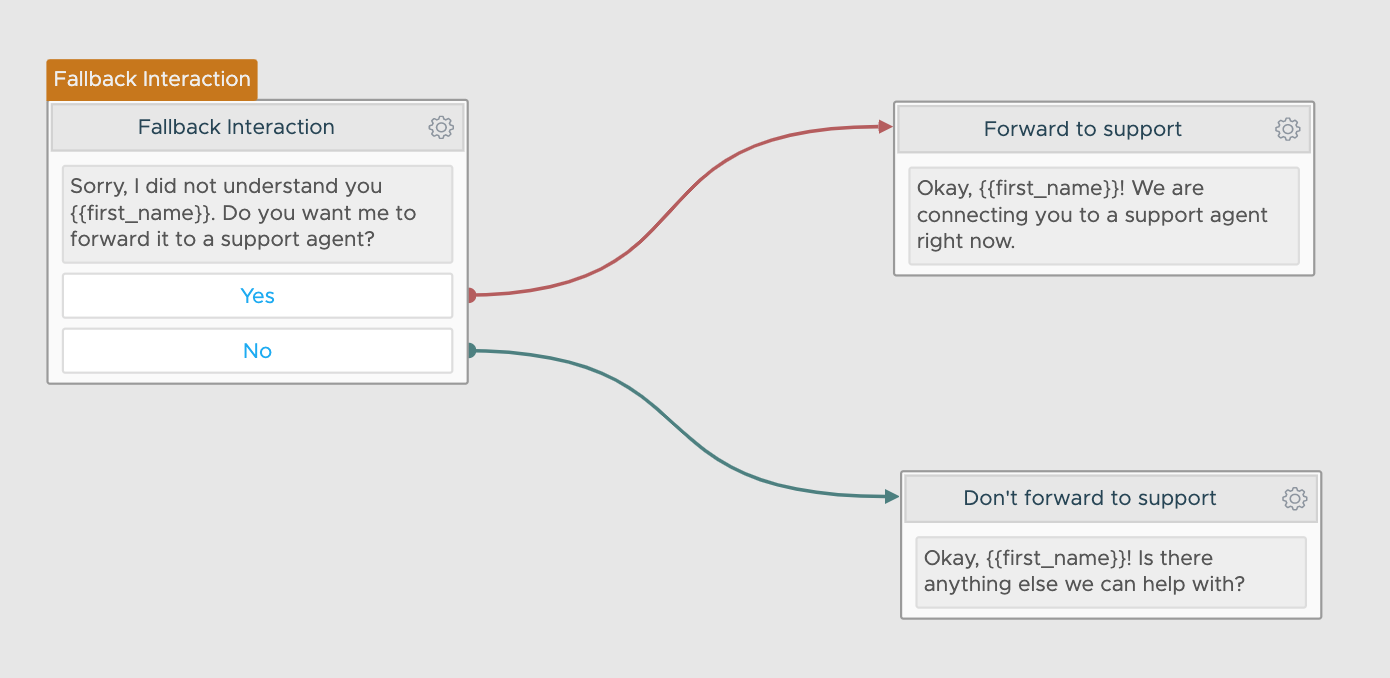
Now, head over to the Build section in Xenioo and look for your Fallback interaction, it looks something like this:

So when the chatbot doesn’t understand something, I like to give the user a choice: Do you need help from a human?
Thus, we need to change the Fallback interaction.
Let’s begin by adding the question.
You can just click on the text in the Fallback interaction and change it to something else:

NOTE: Don’t forget to hit the Save button!
Next, we need to give the user a choice. A choice between choosing between getting help from a human or not. So let’s make two interactions for that.
Just click somewhere in the Flow editor, then on the right-hand side there will be a panel where you can choose for “Add interaction”:

Click on the interaction and name it “Forward to support”:

By the way, I always like to give my interactions a name. It keeps your chatbot flows structured and in a blink of an eye, you understand the whole overview.
We can do the same for the alternative (not forwarding to support), by just clicking on the Tools icon and cloning the existing Interaction:
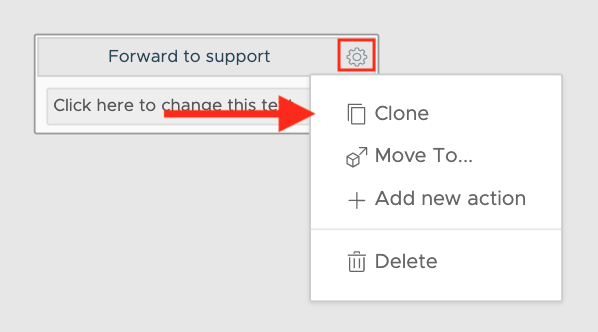
NOTE: See what I did there? You can just copy different interactions within your chatbot flows. Great feature!
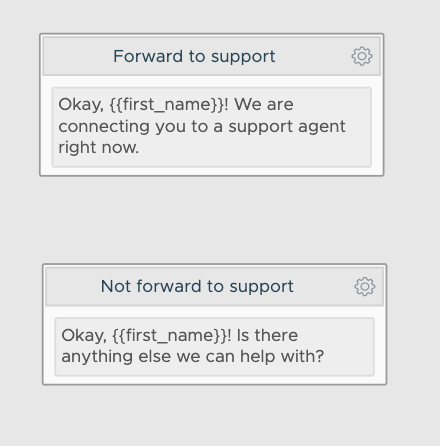
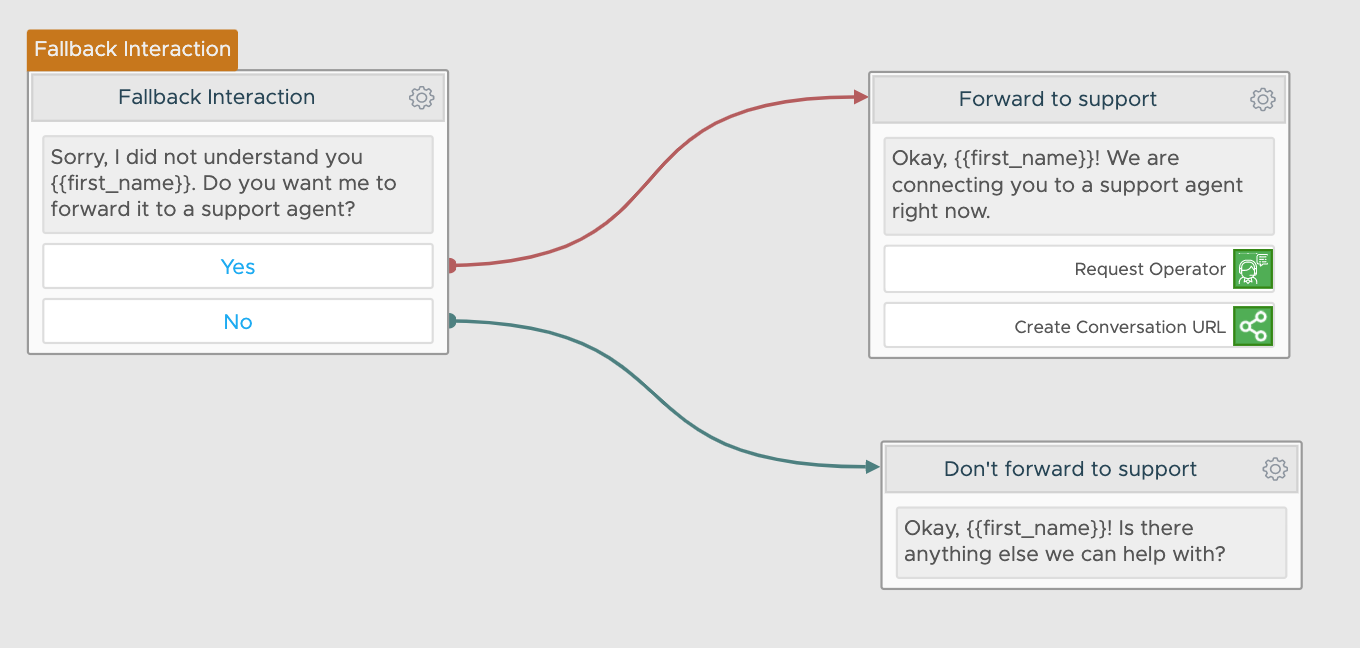
So, now we made these two messages:
But, we need to make a flow, so that if the user answers “Yes” to the question, he will go to “Forward or support”.
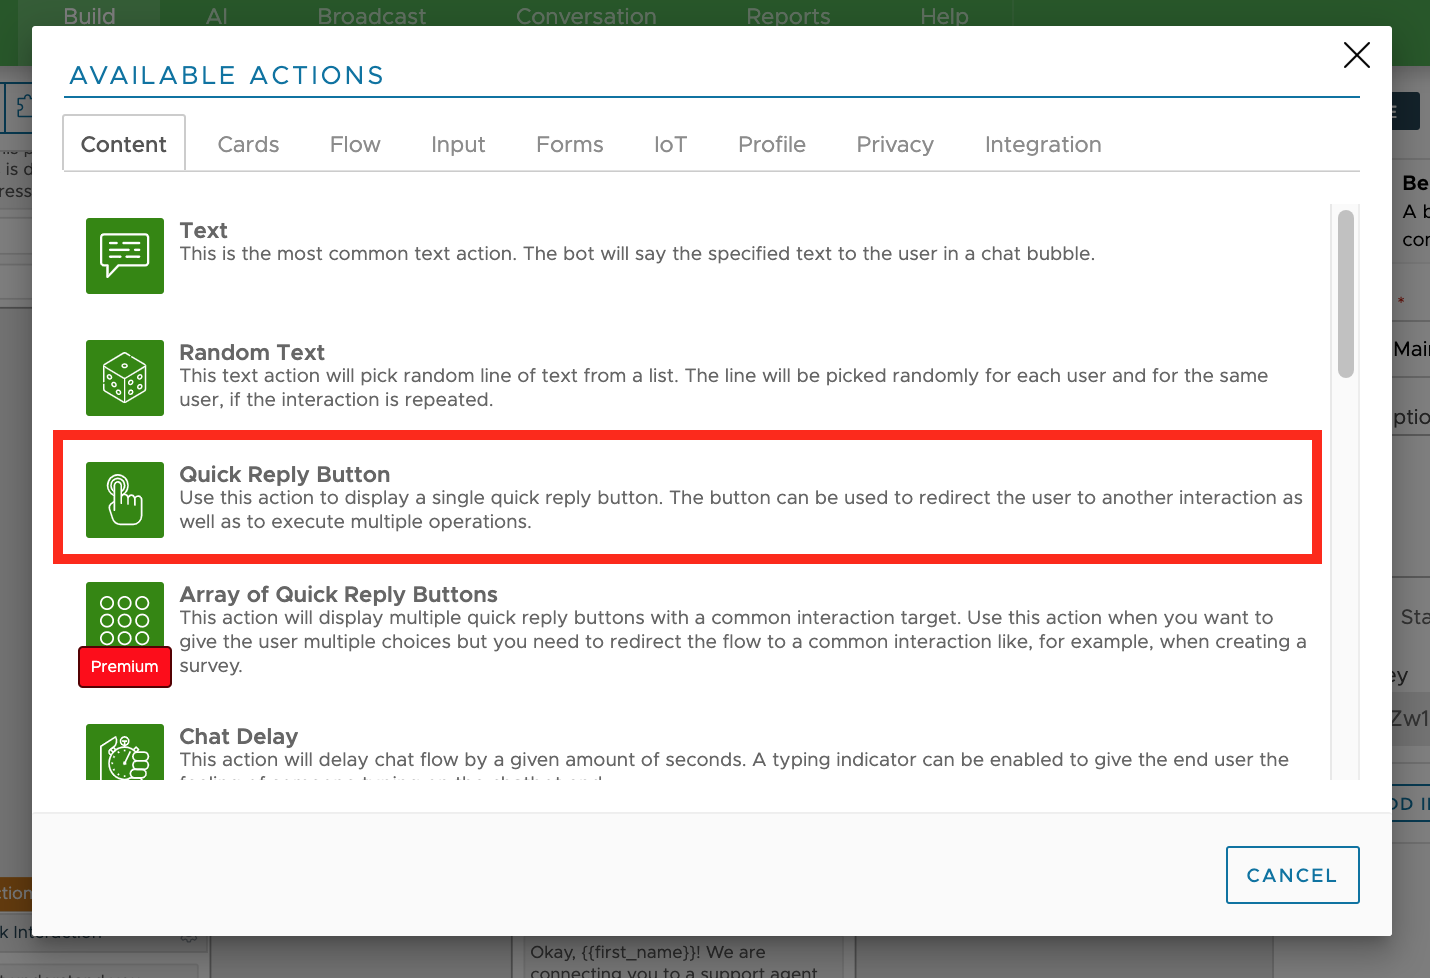
Thus, let’s do that! Go to the Fallback interaction, click on the Tools icon and click on Add new action:

Then, under “Content”, choose for the Quick Reply Button:
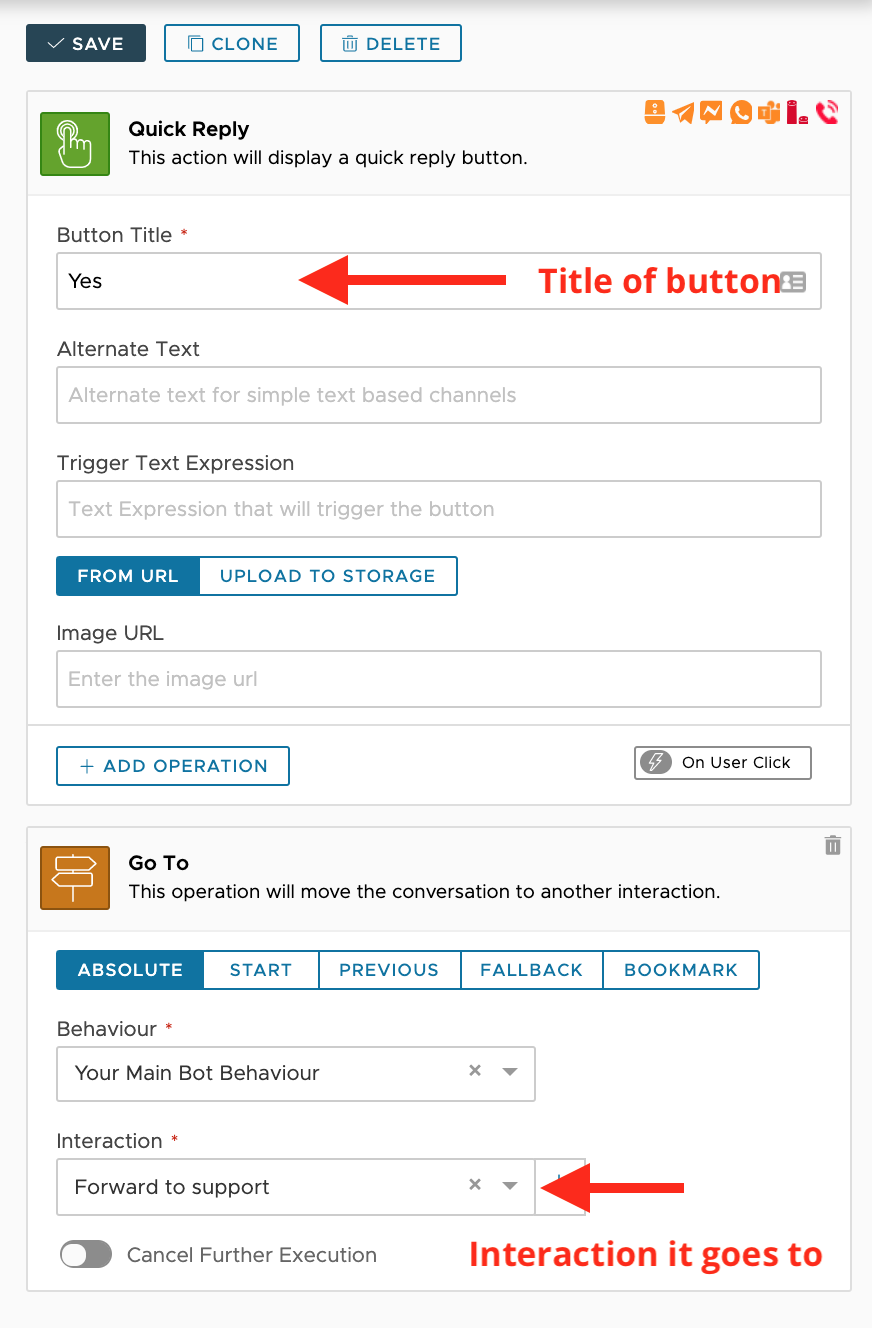
Here, you can set the Title of the button and under “Go to”, you can choose the interaction it goes to:
We can do the same for the “No” button, so the final flow looks like this:
Assigning a live chat agent to your conversation
Now we got the messages in our customer support chatbot flow, we need to assign an agent to the conversation if the user wants to forward it to a support agent.
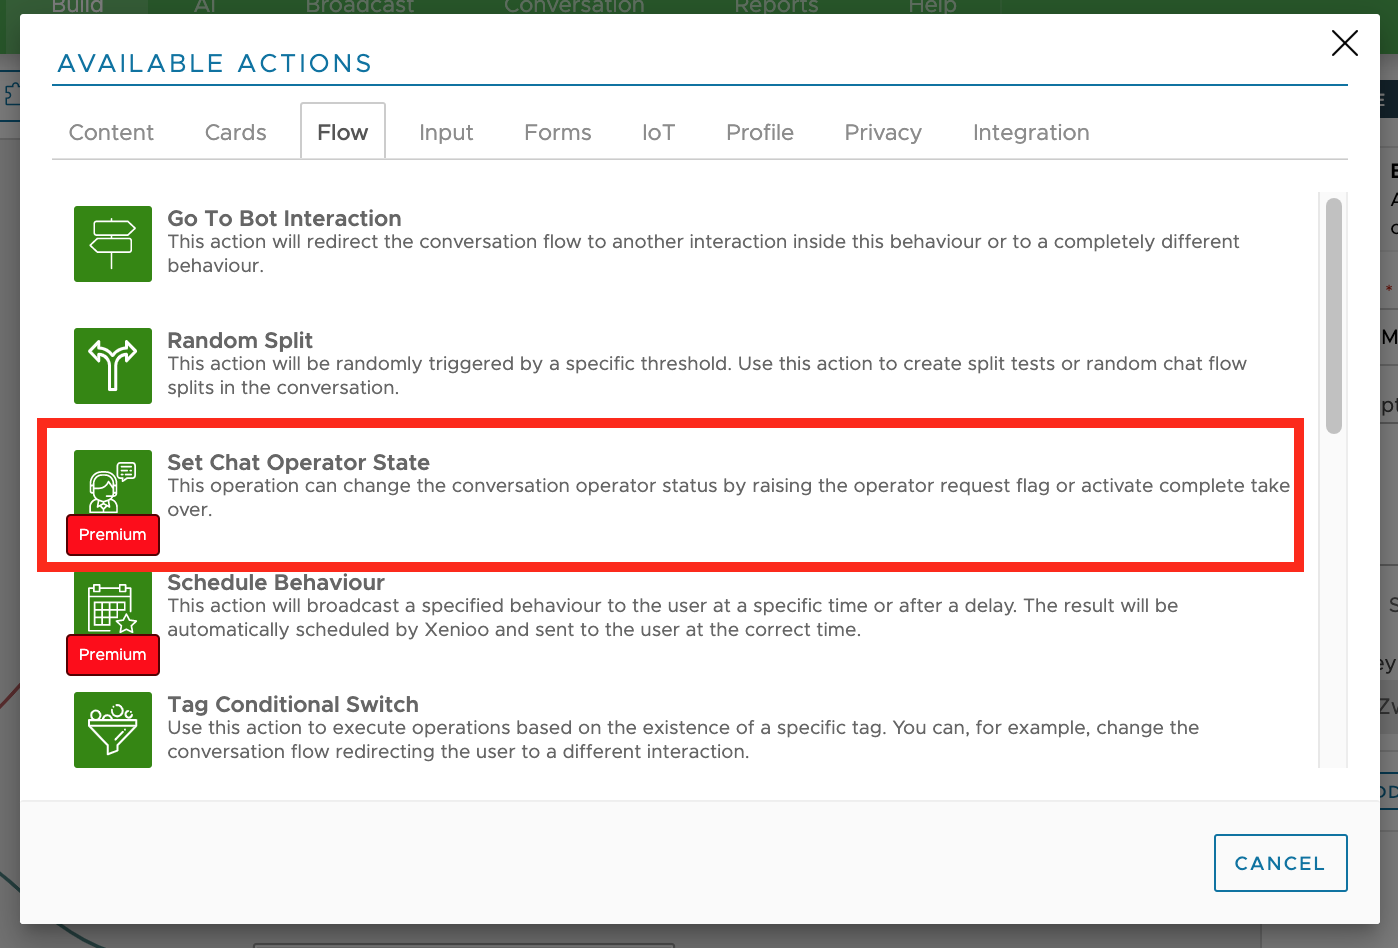
So, head over the Forward to support interaction, click on Add new action and choose for Set Chat Operator State (Under Flow):
Now, on the right side of your screen, a panel pops up where you can edit the settings of the Set Chat Operator State action:
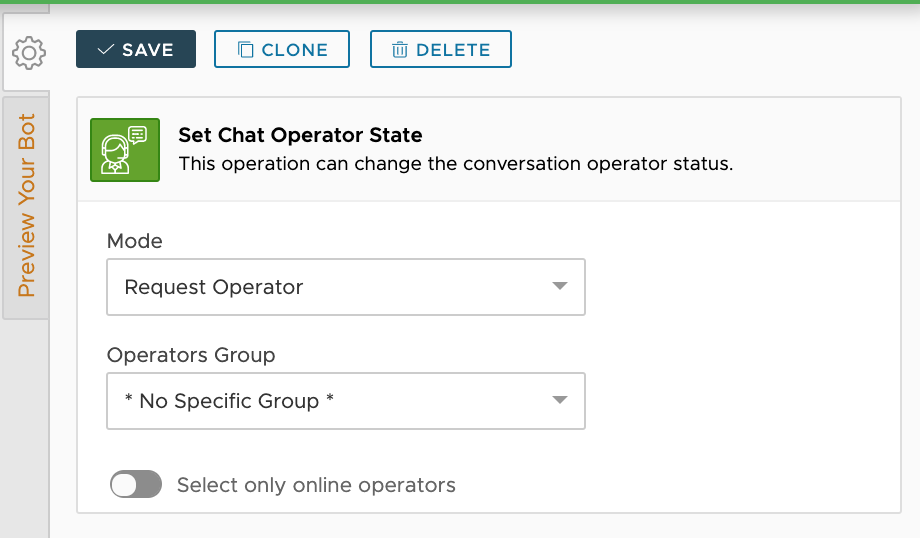
First, we need to determine which mode we want to use. We can choose between two modes:
- Request operator
- Operator take over
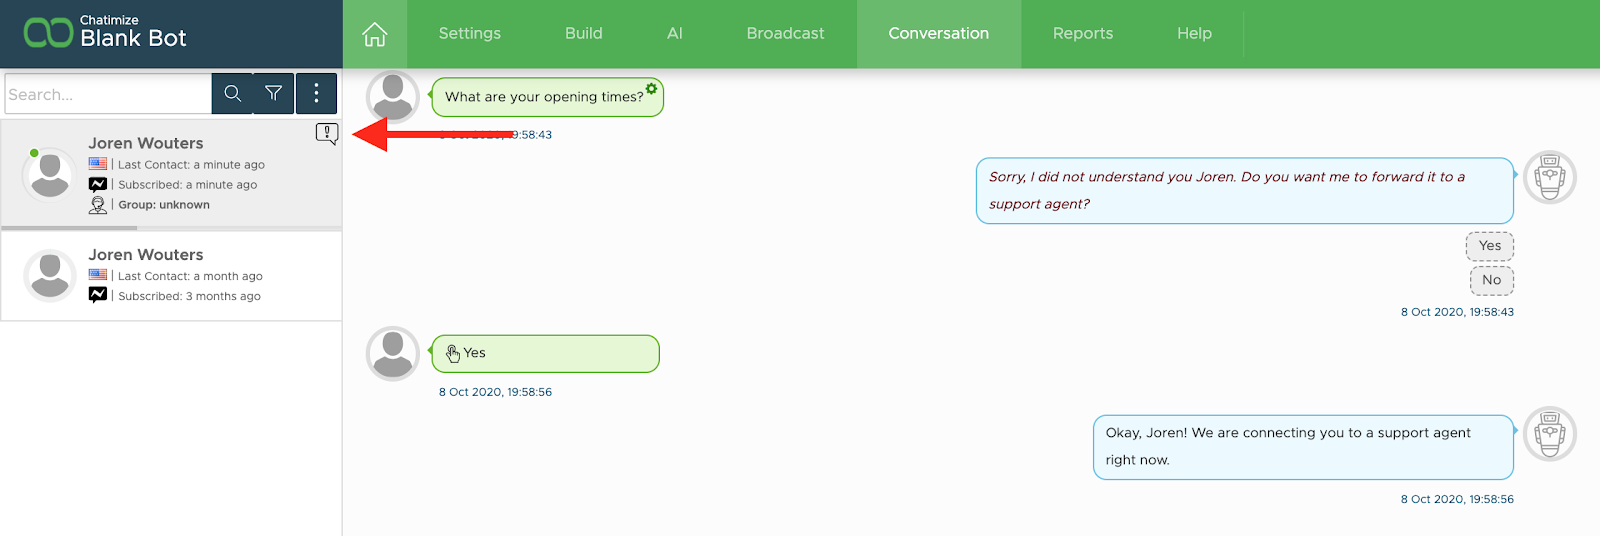
With the “Request operator”, a request operator flag is raised for a specific conversation, which looks like this in Xenioo:
But this doesn’t deactivate the chatbot. If you want that any user input is ignored by the chatbot, choose for “Operator take over”.
And that’s the mode we are going to use!
By the way, there is also a third option called “Chatbot controlled”, but we will not need that in this tutorial 🙂
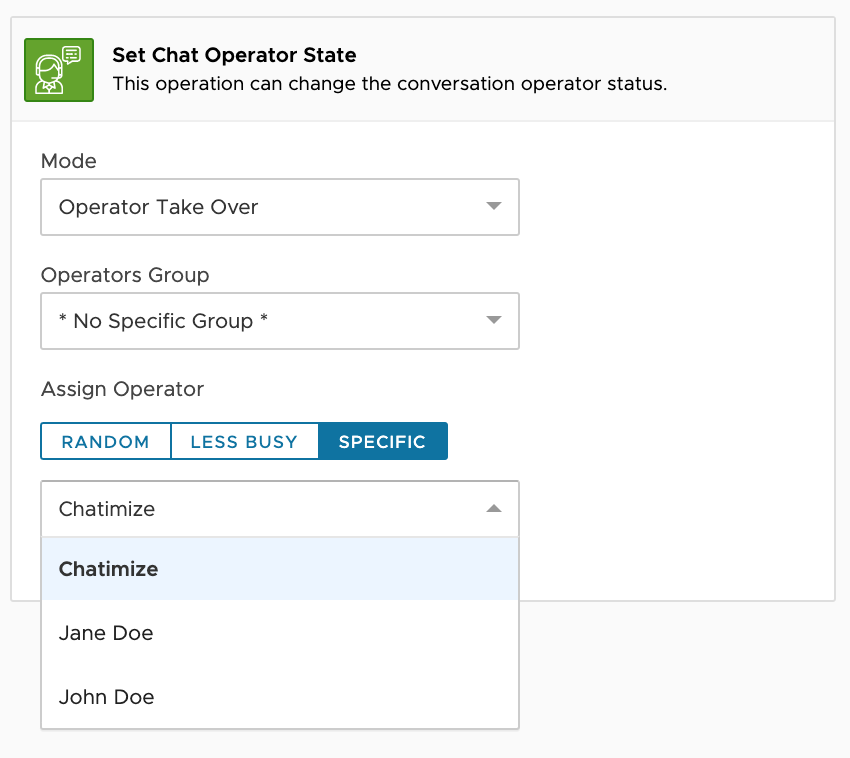
So, if you choose for Operator Take Over, you can also set what kind of operator you want:
- A random operator
- A less busy operator
- Or a specific operator
If you choose for random or less busy, Xenioo will determine the operator for you. But with a specific operator, you can select one person from a dropdown list:
Last but not least, you can also choose for online operators, which is an extremely useful feature:

My recommendation is to go with the following:
- Mode: Operator Take Over
- Assign operator: Less busy
- Select only online operators
With these settings, you make sure that the chat is handed over from your chatbot to a live chat agent. Besides, you have agents that have the time to respond to your user and are online.
Couldn’t be any better, right?
Assign agent groups to your conversation
So far, we’ve covered how to assign any agent or a specific live chat agent to a conversation inside your customer support chatbot.
But, what about agent groups?
Often, there are specific agent groups in companies, such as Support and Sales.
Thus, it would be useful to assign a chat to a specific group of agents.
And that is possible with Xenioo!
Just head over to the Set Chat Operator State block we already made and under “Operators group”, choose a specific group:
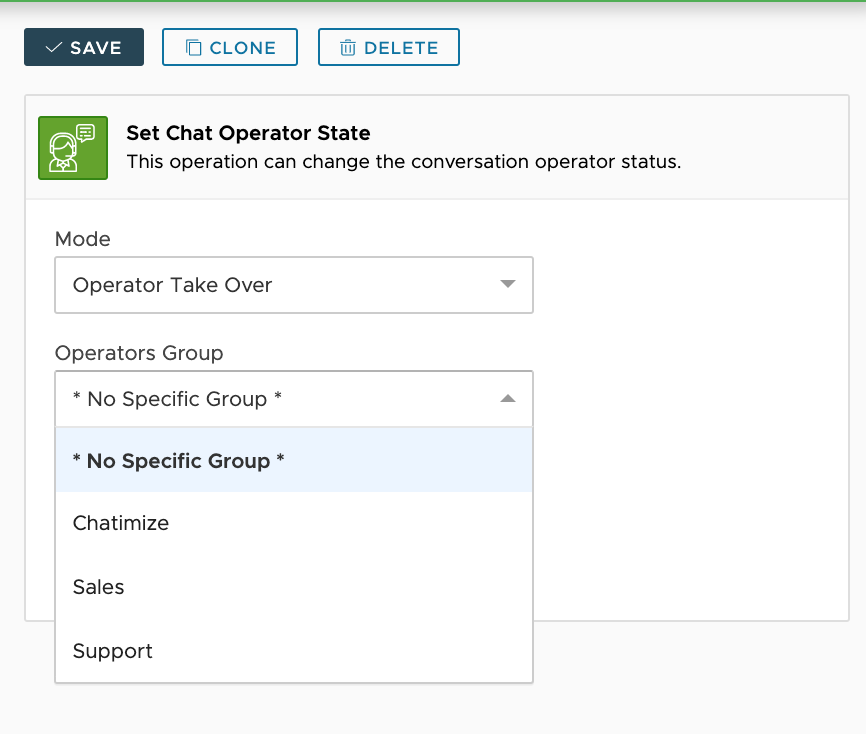
And that’s it! You just assigned a chat to a specific group!
Sharing a conversation URL
We have one last feature to cover: Sharing a conversation URL.
This is one of the best support features that sets Xenioo apart from other chatbot software companies.
Let’s imagine that you are a support agent and you are having trouble giving the right answer to a customer’s question. But, you know that your colleague Dave knows the answer to that specific question.
However, Dave is already done with his shift and doesn’t have his laptop around. So, what do you do?
It would be easy if you could just hand over the conversation to Dave’s mobile phone, right?
That’s where the Sharing a Conversation URL feature comes in.
With Sharing a Conversation URL, you can just send over a URL that will automatically bring you to the conversation.
And the best part is that you don’t even have to log in to respond. You can just use it in your (mobile) browser. This is perfect if you need to respond to a customer’s question on the go:
So, how do you activate this in Xenioo?
Just head over to the Forward to support the block we made before, add another action and choose for Create Conversation URL (Under “Flow”):
Next, you need to set the Validity (how long the link stays valid) and if you want to take over the conversation:
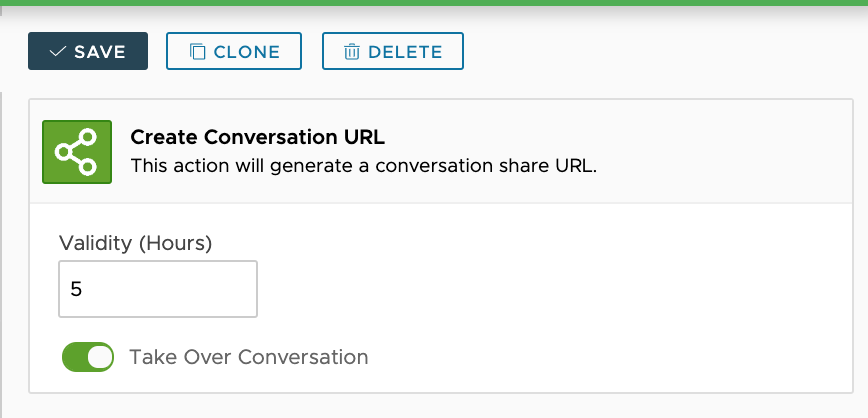
NOTE: It is important to toggle the “Take Over Conversation”, because otherwise you can only see the conversation with the URL, but cannot respond to it.
Up and until now, this is the chatbot flow we created:
But, we are not there yet.
Let’s move on.
Notify the live chat agents
There is still one thing left to do in your customer support chatbot. The user can choose to forward the conversation to support, but how do the live chat agents know this?
They don’t… yet.
But we can notify them in Slack!
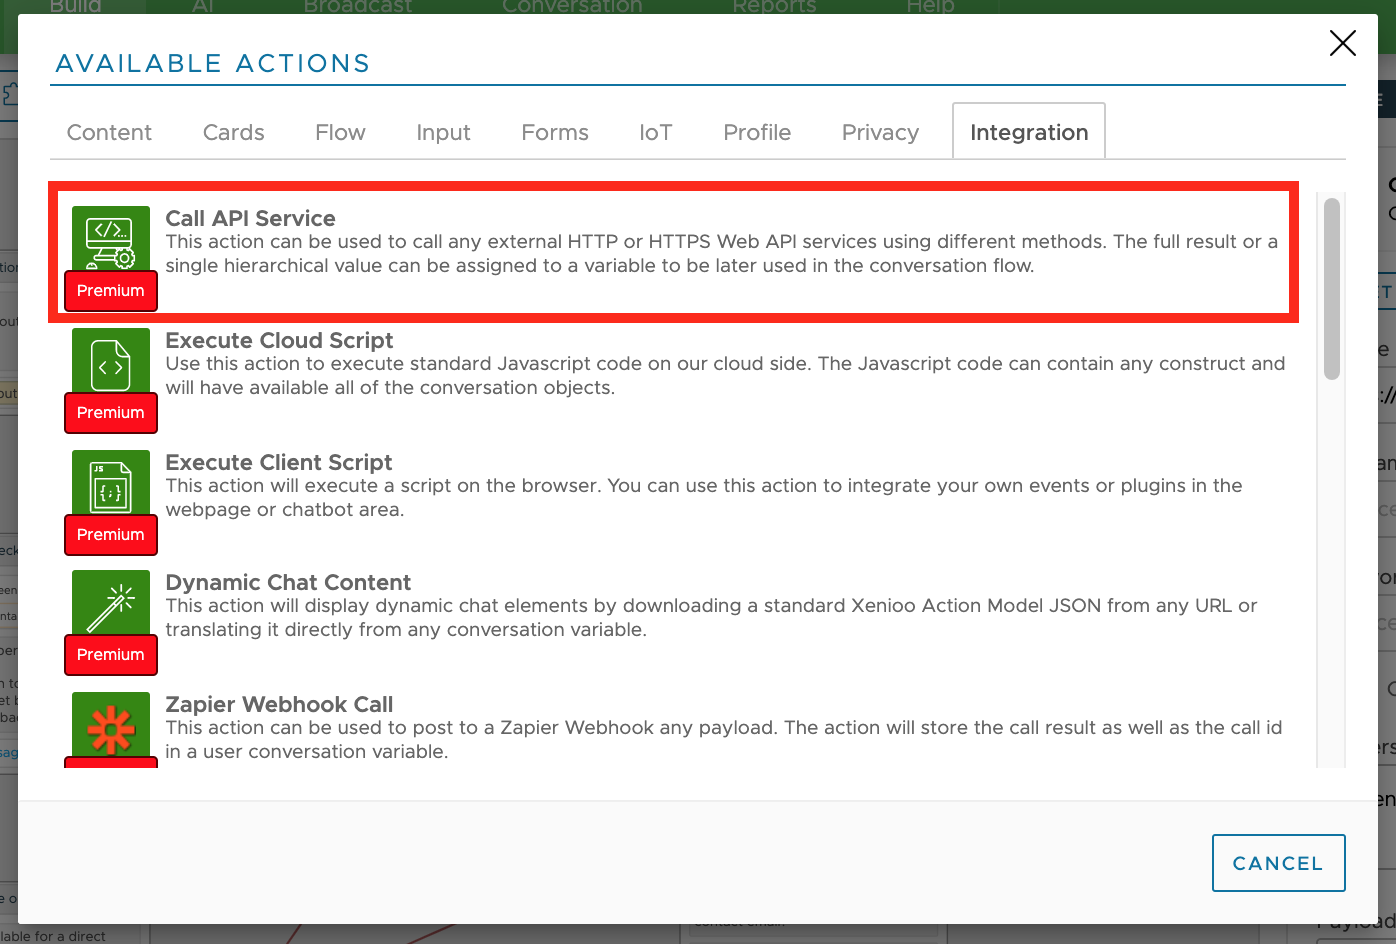
Again, head over to the flow builder in Xenoo and add the Call API Service (under Integration) to the Forward to Support interaction:
In the API settings, you can fill in the Service URL, Headers and Payload of the message:
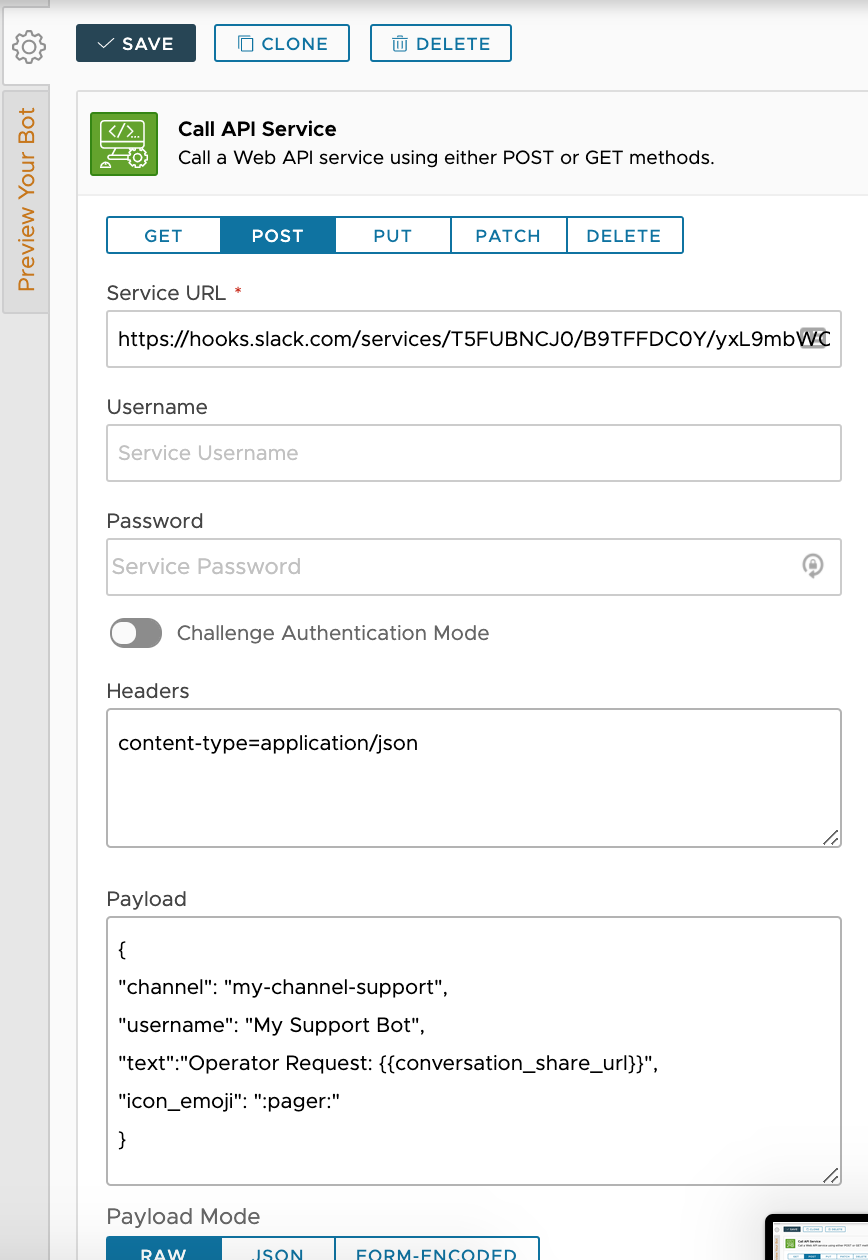
NOTE: If you are not familiar with creating webhooks between systems, you might want a developer to create this.
Once you’ve set this right, every support request will be sent to your live chat agents in Slack!
Awesome, right?
What if the live chat agents are offline?
Unfortunately for our customers, we all have to sleep at some time.
So, this means that a user wants to talk with your chatbot in the middle of the night (especially with a chatbot).
And then, your live chat agents are offline and they cannot ensure a great experience for your users.
Then, you just need to tell them they are not online.
And we can do this by creating a Variable Switch in the Xenioo flow:
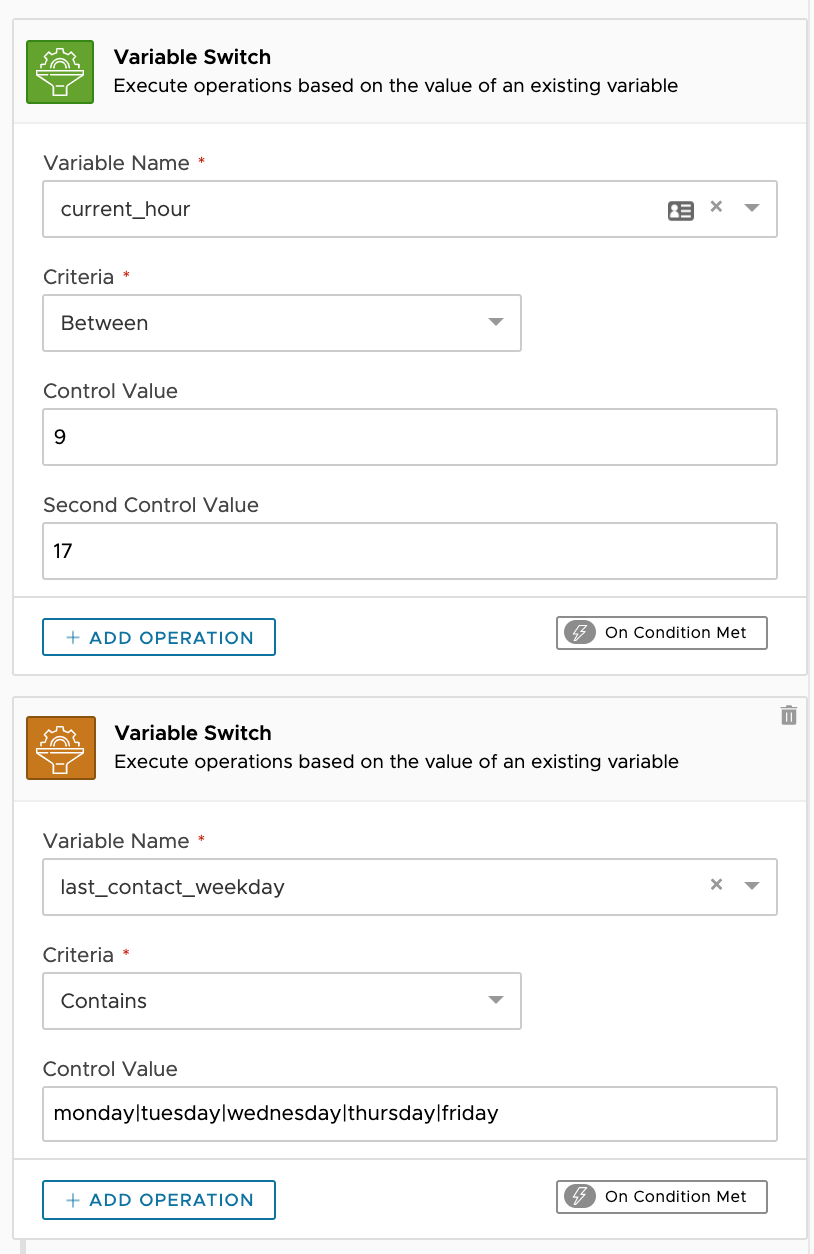
This switch checks if the current hour is between 09:00 and 17:00 (standard business hours). Moreover, it checks if the current day is a weekday.
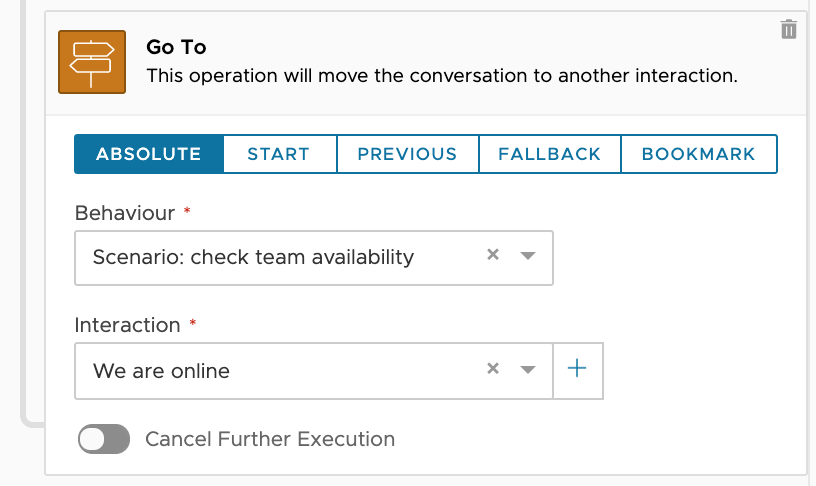
And when the user meets this condition, you can determine which interaction to send next with the Go To action:
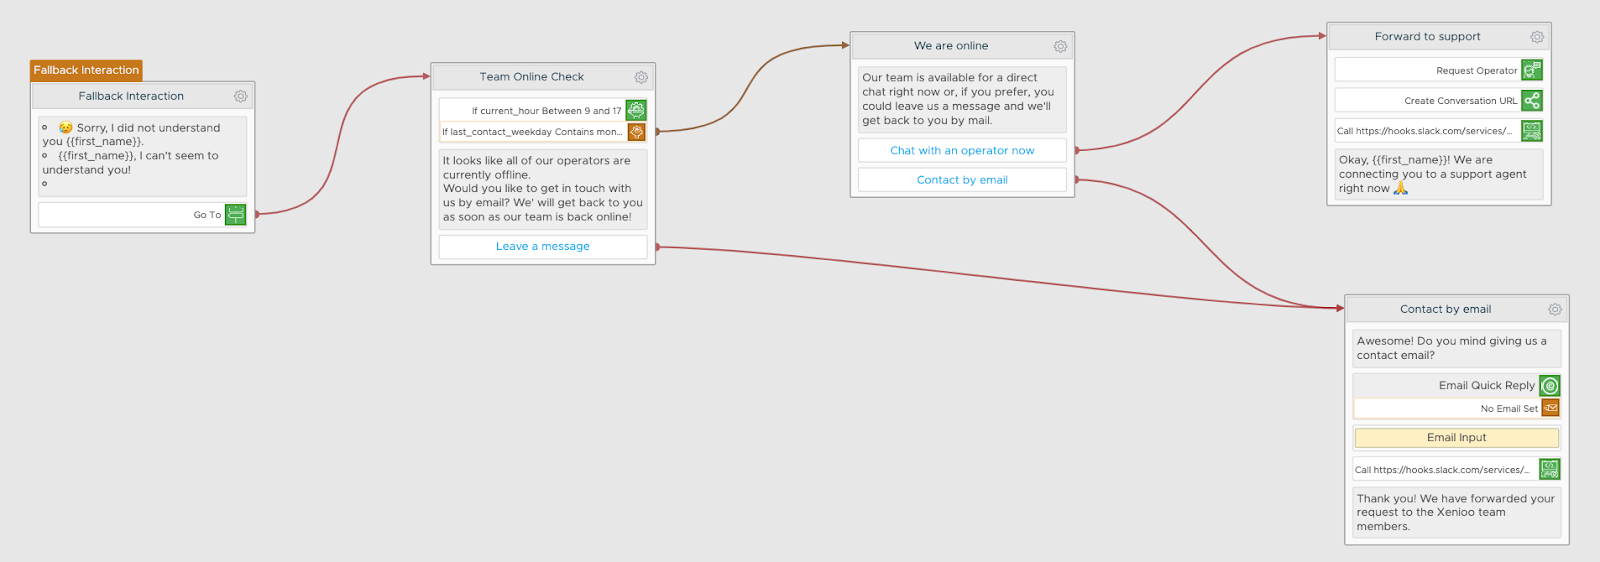
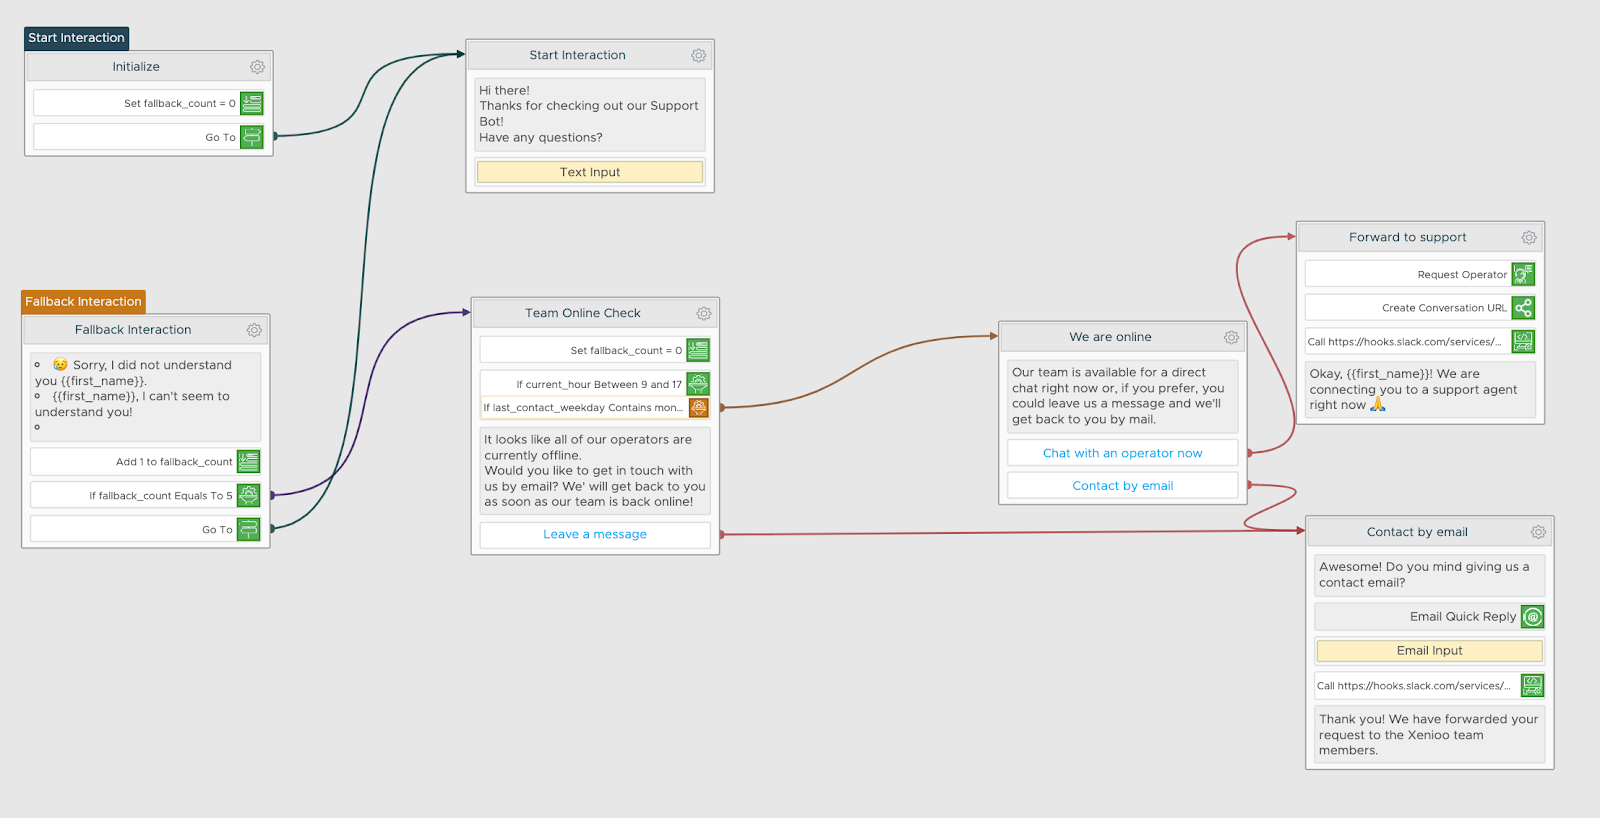
By now, I guess you are probably kind of a chatbot wizard, so I won’t explain every step in this flow, but it can end up looking like this:
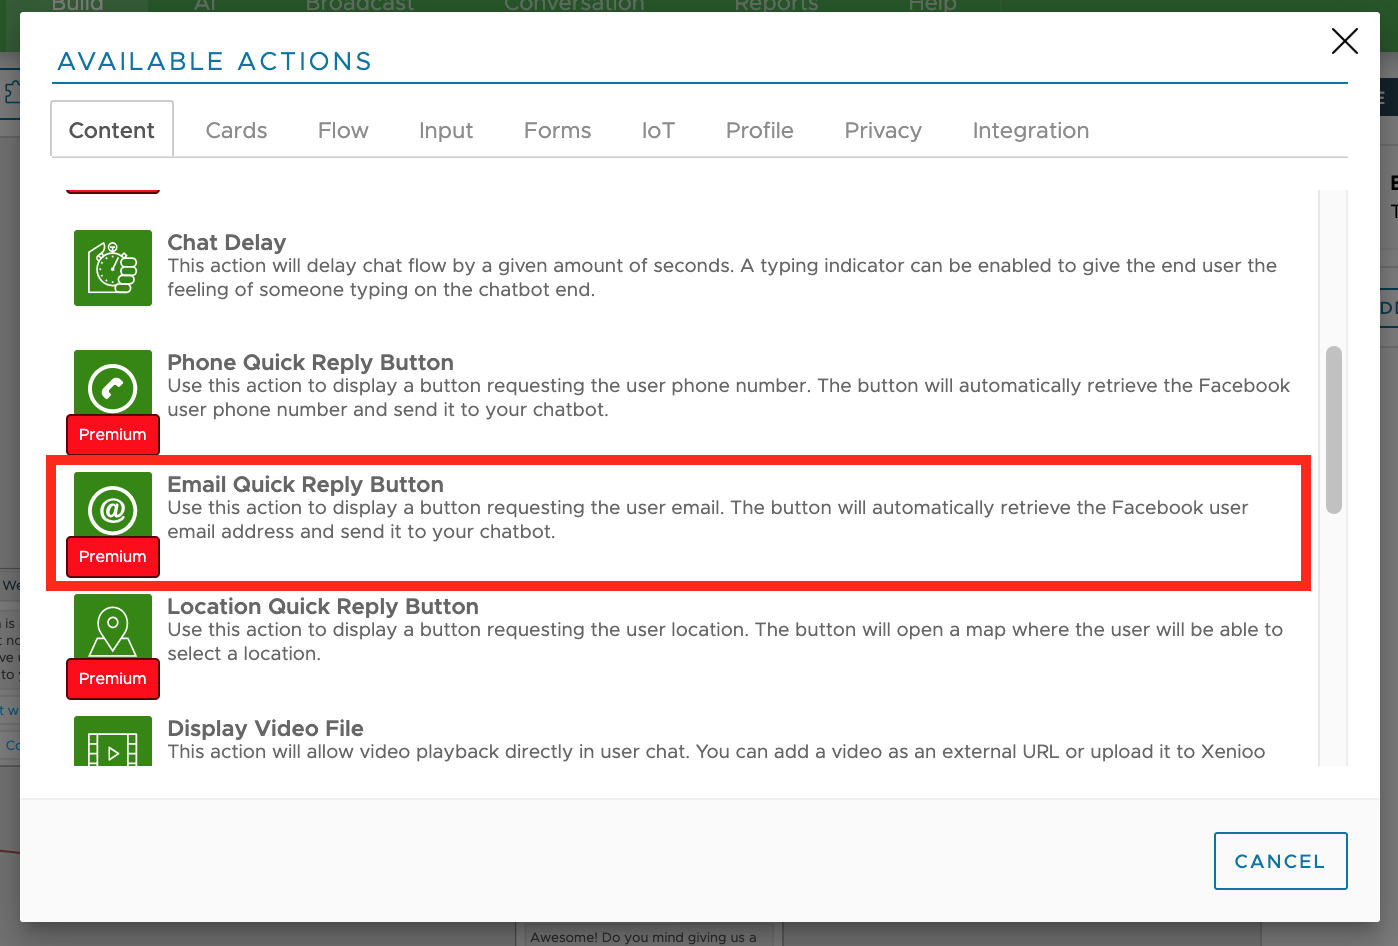
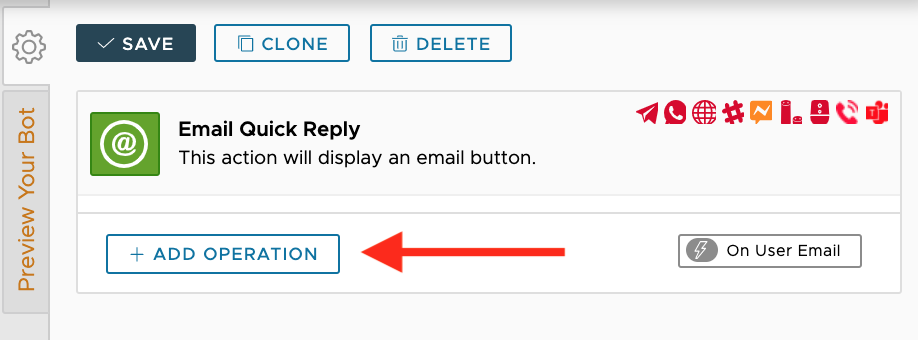
The only thing I didn’t explain yet (what is in this flow), is how you can send an email from Xenioo. Again, just add an action to an existing interaction, and choose for Email Quick Reply Button (under Content):
Once you selected this, you need to add an operation:
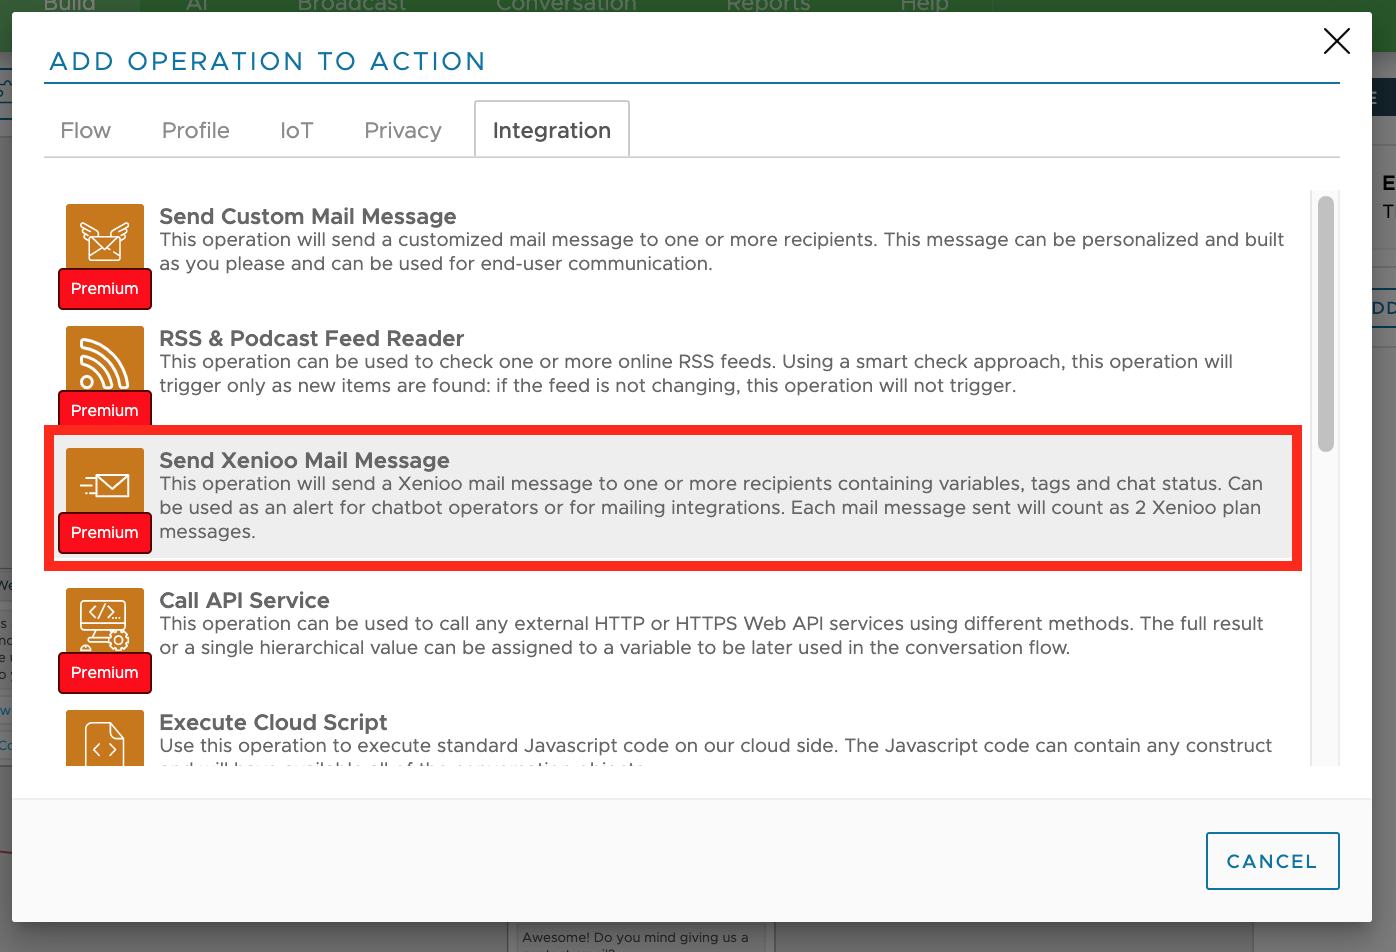
Then, choose for Send Xenioo Mail Message:
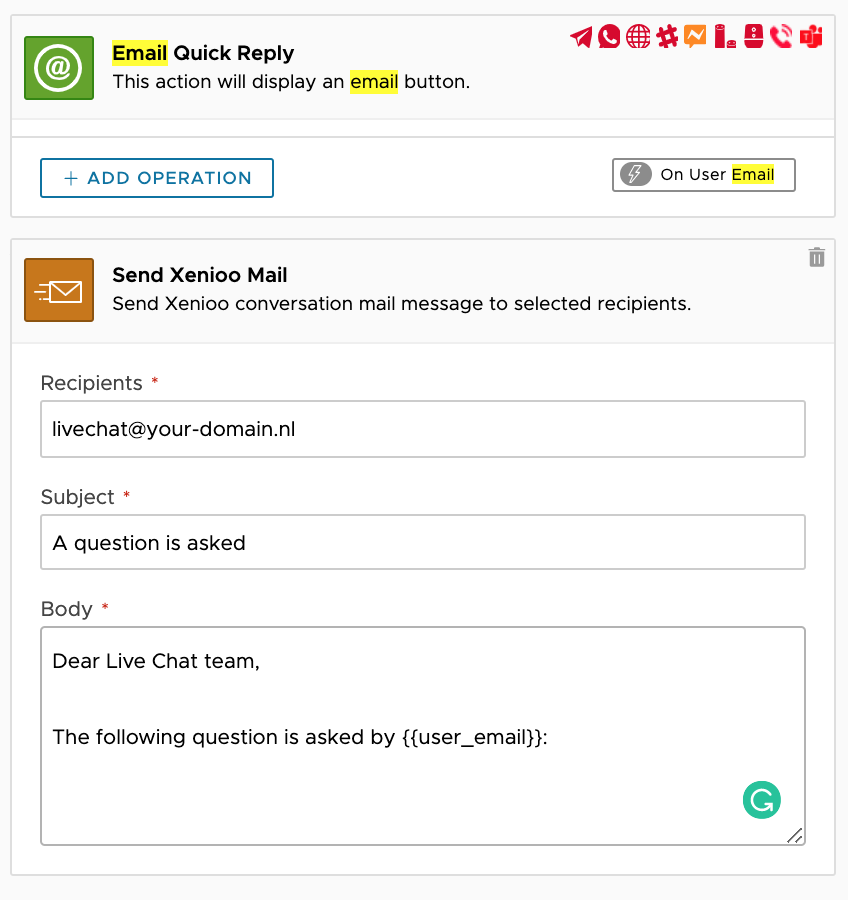
And eventually, you can set the sender, subject and content of that email:
Ask for live chat agent after five times
In some cases, you don’t want to trigger the live chat team right away if your chatbot doesn’t know an answer to a question.
Maybe, you first want the customer to try some other phrases that might trigger the chatbot.
In such a case, we can ask for a live chat agent only after five times the fallback happened.
By the way, you can also set this to 2, 10 or 30. I just use five in this example 😉
We will do this by increasing a variable with 1 every time the fallback interaction occurs.
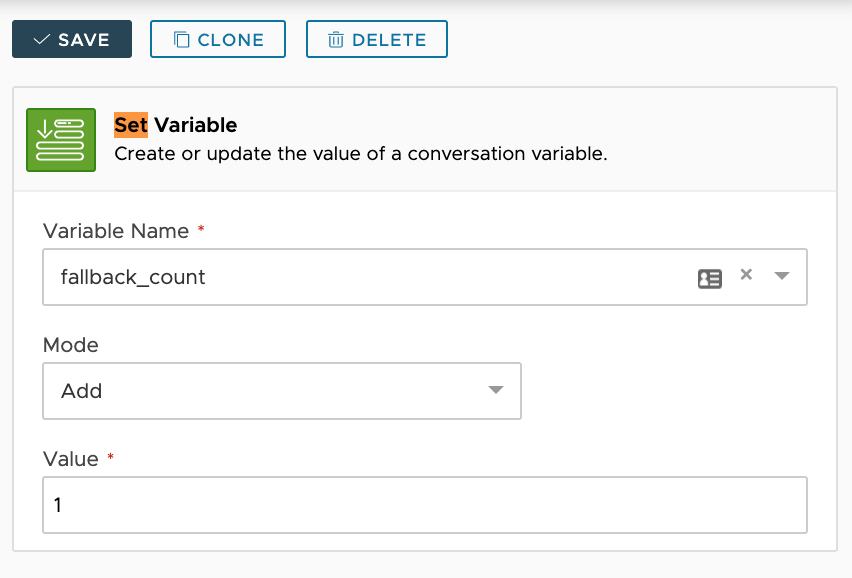
So, let’s add an action to our Fallback interaction, called Set User Variable (under Profile):

Here, we can just type in the name of the variable and increase it with 1:
Next, we are creating another Variable Switch to check whether the variable ‘fallback_count’ is equal to 1:
I will spare you the details of every step in this flow (because we already covered all the elements we are using for this), but the eventual flow can look something like this:
That’s it
That’s it! That’s how you can build an amazing customer support chatbot to manage your distributed support team with Xenioo.
Now, let me ask you a question.
How do you currently manage your distributed support team?
And would Xenioo make your life easier?
Join the Facebook group and let us know!