This is the first of two-part posts where I’m going to detail all the steps to build a complete Q&A chatbot. Thanks to Xenioo built-in NLP and Database features you’ll see how it is possible to realize such a powerful and smart chatbot without writing a single line of code.
The Let’s Build posts series aims to show how a complete chatbot can be built using all of the available Xenioo features with the highest possible detail. By the end of each post, you will gain insight into basic and advanced Xenioo functionalities and be ready to try more complex approaches. All of the additional material used for these posts and the complete chatbot are made available here for download or inside the Xenioo templates section.
- Why building a Q&A chatbot?
- Let’s start with a very basic flow
- Setting up questions for your Q&A chatbot
- Training your Q&A chatbot AI
- Import and export training
- Training entities
- First testing of your Q&A chatbot
- Configuring answers
- Building your Q&A chatbot answers database
- Filling your Q&A chatbot answers
- Under the hood
- Improving your Q&A chatbot flow
- Final Q&A chatbot question test drive
- Until next time…
Why building a Q&A chatbot?
The basic idea of a Q&A chatbot is to have a virtual assistant capable of giving information on a number of topics.
A healthcare Q&A chatbot could for example reply to a general health question. A Gym chatbot could be able to explain to users how some exercises work or how to adjust their diet.
While all of this may sound rather simple in the beginning, a complete Q&A chatbot can easily become very tricky, very fast. From users asking questions in the most disparate ways to answers continuously needing some kind of review, our chatbot may become quite cumbersome to manage in the long run.
Let’s see how we can Xenioo power to minimize all of the above and make a complete and manageable chatbot.
First, let’s see what we want from our chatbot:
- It must be capable of understanding free-form questions such as “how do I…” or “How much…” etc. with minimal training;
- When an unexpected question is received, it must be capable of training itself;
- It must be capable of replying to a question with complex text;
- Should be able of detecting similar topics and group them so that the user can define an open question;
- It should stay, when possible, on topic. A question without an explicit topic should be inferred from the previous topic;
- Answers must be managed by our customer without touching the chatbot design;
- It must collect feedback on its performances so that we can easily check if users are happy with it;
- It must have some way for our customer to check the performance based on users feedback;
Well…I guess this should be enough? 🤯 Let’s start!
Let’s start with a very basic flow
To start our chatbot, we create three simple blocks that we will later expand.

Just three Interactions as you can see.
The Start Interaction will just act as a welcome, where we greet our user. We can easily expand it later to differentiate the greetings based on our contact gym registration or when we want to promote some subscription offer.
The Answer interaction is empty for now but it will become the most important part of our chatbot later in this build.
Last, but absolutely not least, we have our Fallback Interaction. This is where your chatbot will fall back whenever something is not understood.
Instead of a fixed text, we’ve used a Random Text Action to pick a random line to make it look like there is a little variation in each reply.
Setting up questions for your Q&A chatbot
For our example, we choose to build a Gym Chatbot. Our example chatbot will be available to reply to our users about subscription, exercising, and general fitness advice.
Building a static flow chatbot is surely a simpler task, but for this example, we are going for the conversational route: we want our users to ask freeform questions and try our best to understand their intents.
The first thing we should do is make a list of all of the questions our chatbot can cover. These questions will become our “Intents”.
- Opening hours
- Costs and courses
- Personalized plan
- Frequency
- Equipment
- Exercises
Of course we can later expand our chatbot with many more intents but let’s start with these so that we get the hang of it.
Training your Q&A chatbot AI
When setting up our AI, each Intent should describe generally the intention of the user. Inside each intent, we will add expressions. The expression describes how we expect our users to communicate the intention.
As an example, the Opening hours intent may be expressed by our users as “at what time are you open?” or “can I come in the morning?” or “are you open on Sunday?”, and so on.
Training the Xenioo AI follows the very same concept. First, we create our intent and then we add our expression to it. So, following the example above, we can go to the AI section of Xenioo and add a new intent named “Opening Hours”.
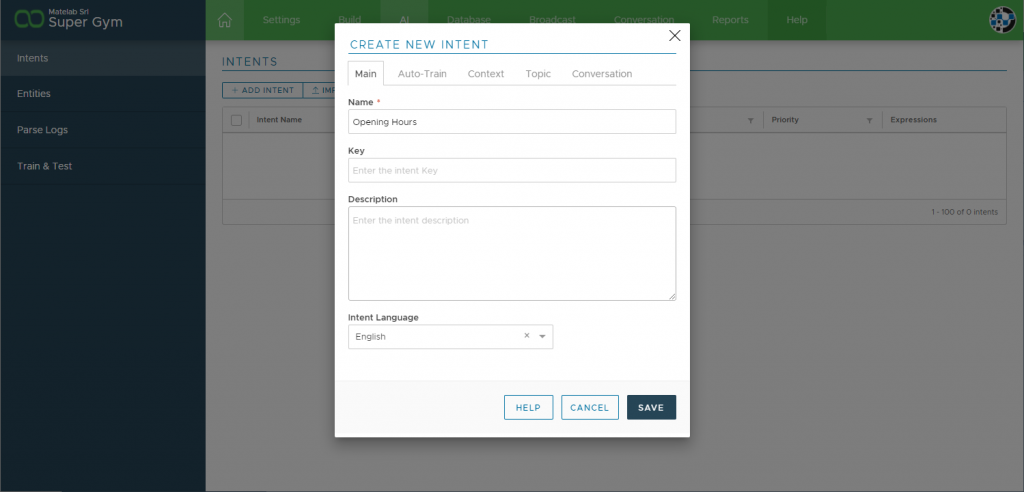
All we need to do right now is just give it a name and make sure that our target language is selected. We can also add a description if we feel like it.
Let’s save so that our intent is created and we can see it on our intents list.
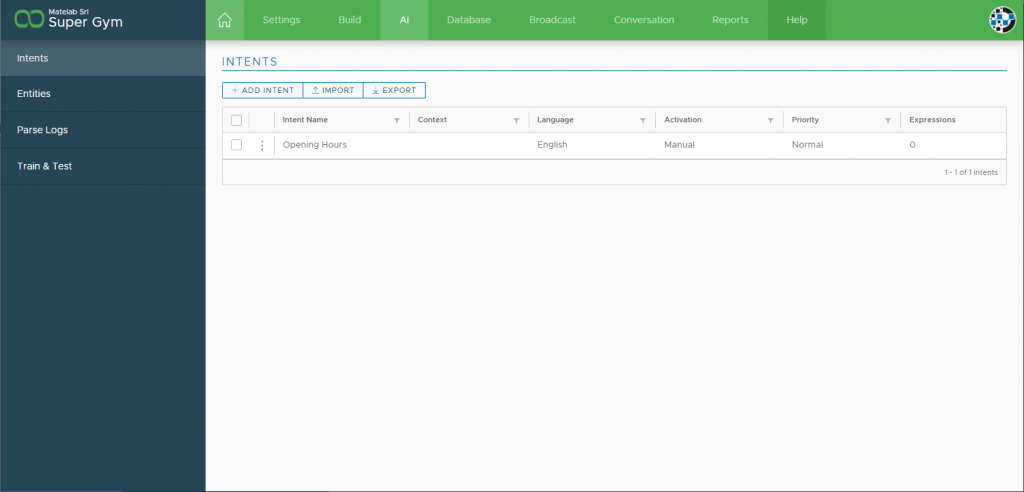
At this point Xenioo knows about the intent but has no idea of how we want it to be expressed. Double click on the intent row to access the intents creation settings. From there, you will notice a textbox saying “Users says…” which is were we can type our expressions.
Let’s type our first example: “at what time are you open?” and click on Add Expression or just press Enter. As you can see, the expression is added to the expression list and becomes now part of the chatbot AI training.
While very simple, our AI can already be tested. Let’s click on Train & Test to give it a spin. Typing the expression we just added and clicking on Evaluate Expression will create a result like this:
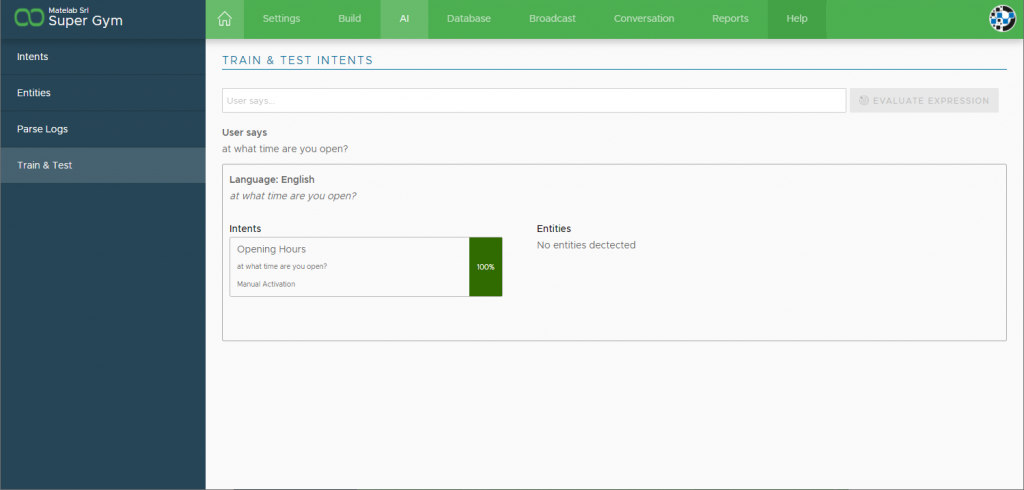
We used the very same expression and of course, it is detected with 100% confidence. That was easy but let’s try instead a differente expression, something we did not yet train: are you open on Sunday?
Trying the expression above gives us an interesting result. First, the sentence is different but not so much to be totally out of reach. It is nearly on a 50% match on the single expression we trained.
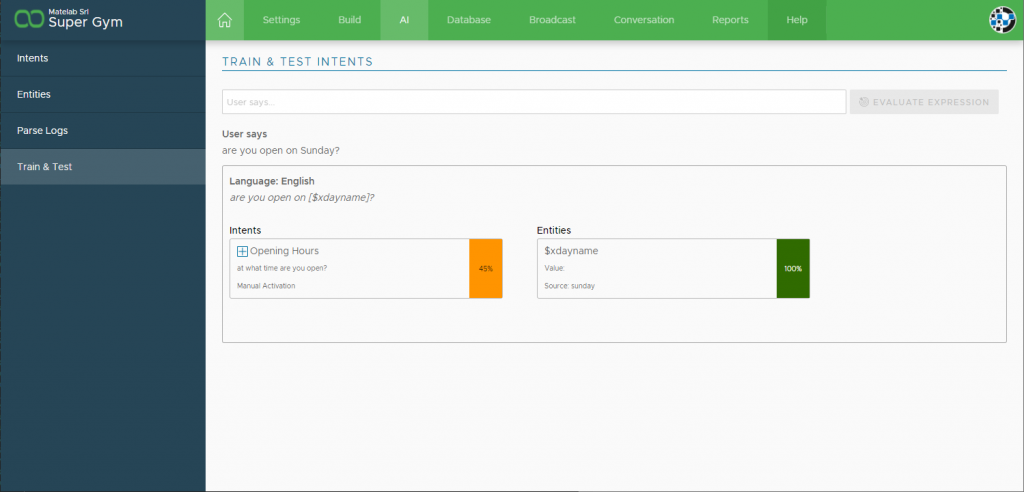
The second interesting thing, is that Xenioo recognizes Sunday as an entity: a word that can have multiple different values and that we can later use as a variable parameter. We did not train Xenioo to recognize the days of the week: these are built-in entities.
Near the Opening Hours intent name you can see a small plus button: if we think the sentence could be a good addition to our training, we can click on it and have the text automatically added to the list of expressions.
Try it now and see the results: Xenioo will re-train the AI and submit again the expression. It all green at 100% now!
Import and export training
Interactive training like the one we just experienced with Xenioo gives you a real-time view of your chatbot capabilities. You can literally see as your chatbot grows in its training and is more and more capable of detecting variations and different expressions.
As your chatbot grows more and more complex, it can also be useful to have a global overview of the current training and be able to manage multiple expressions at once. Sometimes, also, you may receive an external list of expressions from third-party tools or custom Q&A software that you just need to use in Xenioo.
To handle these cases, the Import and Export features have been created. From the Intents AI section we can export all of the current training into a standard CSV file that we can later import again as an update.
Let’s export our full training for the current Gym chatbot, that contains just a couple of expressions.

As you can see we have our expression on each line for our single intent. We can add more expressions by simply adding more rows.
There is of course no real need to do this in an Excel file as everything can be done interactively in Xenioo.
As you might see more often than not, your customer will have a very clear idea of all the questions made by his customers and will be more than happy to supply you with a list of possible questions.
Being able to just quickly drop these questions inside your NLP training will surely cut a good amount of project time!
As part of this example, we went ahead and completed the training for all of the other questions. You’ll find them as part of the full free Gym template training and, of course, you can also download our complete example file.
Here is a small extract, just to give you a general idea of the final results:

We’ve added some extra expression and activated two things that will become very important in the next steps: our intent key and the Auto Training.
Training entities
Entities can be seen as dynamic parts of an expression. Like parts of a sentence that can be easily changed with something else while still being relevant to the intent. Let’s look at the following questions:
- What are the best exercises for biceps?
- How can I improve my pecs?
Users here are expressing their questions about exercises that are best for specific body parts and both questions could easily have their target element reversed:
- What are the best exercises for pecs?
- How can I improve my biceps?
What we need to do here is not repeating again the training but tell the Xenioo engine that those are Entities and that while the question can stay the same, they can greatly vary.
Creating a new entity is very easy. We just double-click on the intent where the expression with entities is and then click on the word we wish to transform into one.

When Xenioo asks to define what the word is we can just give it a simple name like “bodypart” and press enter to confirm. We can then move to other words that we consider “bodypart” and set them as entities as well.
You will notice that the “Train & Test” section is now highlighted with a hint mark: this is Xenioo telling us that our model needs a re-training to apply all of the new entities.
If we move to that section, we can see how our training has gone. Let’s try one the above test questions:
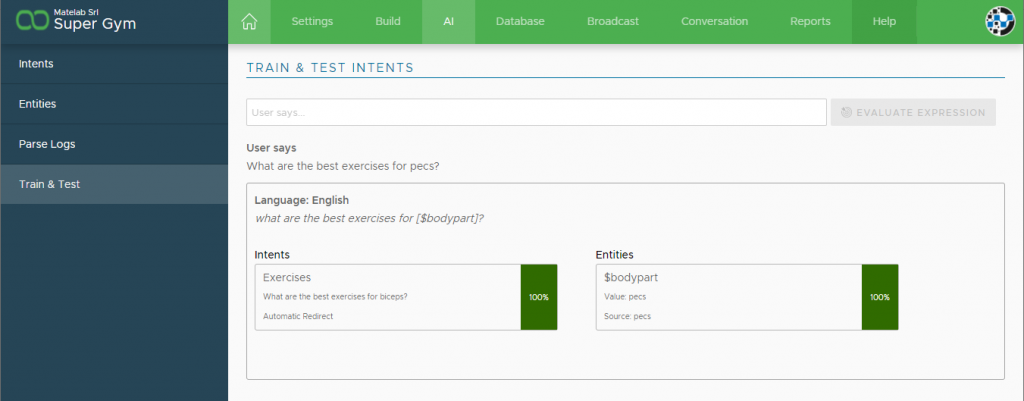
As you can see our results are now extended with Entities. From now on Xenioo will recognize our entities and automatically assign them to variables during the chatbot flow.
We can now not only detect what the user is saying but also extract information that can later be used to differentiate our chat and be used to present more precise results.
But what if our entities are more than the ones we used in our training expressions? Body parts are a lot more than just those two we just trained.
To add more words we can move to the Entities section where we will find our “bodypart” entity. Double click on the entity to access its details and add more words to the ones we already trained.
Xenioo AI Engine also supports synonyms: variation of words that will point to a single value. In our previous example, pecs could also be pectorals but both express the very same target.
Here is our bodypart entity, fully trained:

Again, no worries: you will find the fully trained AI for this example as a free template in your Xenioo account!
First testing of your Q&A chatbot
Although we simply trained our AI, we can already go and test our chatbot. Let’s go back to our chatbot build section and start our preview:

Well, our chatbot does not know what to answer right now but questions are already triggering the Interaction we created and this is exactly what we wanted.
Configuring answers
Now that our AI is trained, we are ready to start building our answers database. Until now, when building chatbots with a big number of possible replies we had two options:
- Create a huge number of interactions. Basically one interaction for each answer.
- Create some sort of back-end service, capable of servicing the text of our answers based on our intents.
The first option does not need any external service but may be considered only if we have very few answers. As the answers grow it may become very difficult to manage your chatbot.
Option two has all the flexibility and room for growth we may need, but it will cost money as you will need some development for your backend, database service, and some kind of hosting.
Luckily, Xenioo has thought to option number 3: what if the database engine was fully built-in in your chatbot tools? That would be a terrific value and merge the best of both previous options!
Building your Q&A chatbot answers database
To start using Xenioo Database all we need to do is just head to the Database section of your chatbot tools. If our account has an active Database Package we will be presented with the option to create our very first collection.
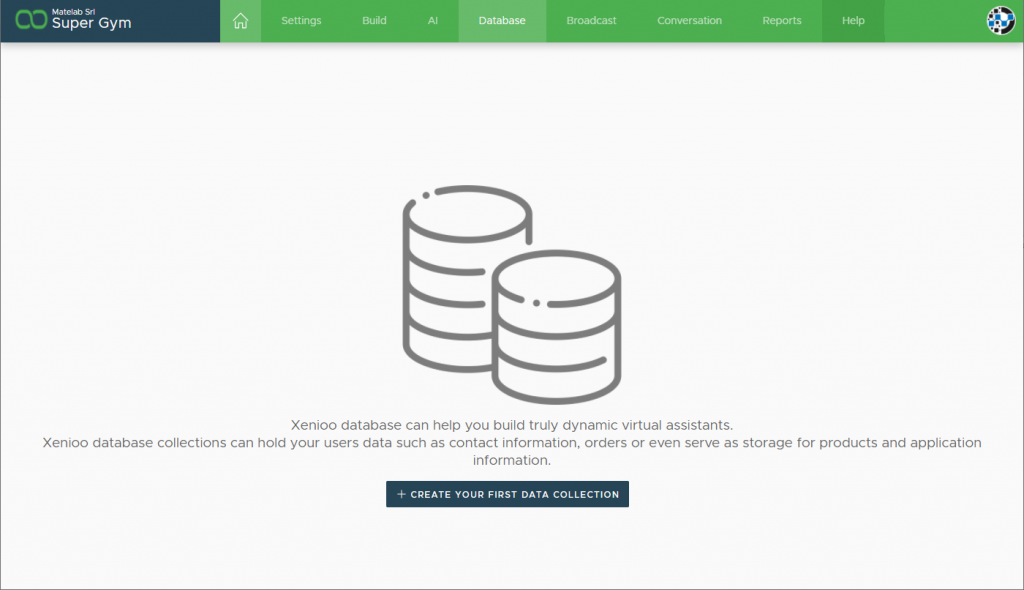
What is a collection? A collection is basically a set of records that contains the same set of data. If we were to draw a comparison, we could say they are database tables (even if they are a lot more than that, but let’s just stop at this for now).
In our example our very first collection will be named “answers” and to create it we just need to click on the big “Create your first data collection” button.
The most important part of our collection is the name. Once we’ve given a name to our collection it cannot be changed later so choose wisely! All other fields instead can be changed whenever you wish.

Let’s leave our API Access off for now: we don’t need this collection to be accessible by any external service and we will come back to this option later.
Let’s move to the Collection Fields section.
From here we can define the fields we want to manage in our collection. This where we really move away from the basic “Table” concept: Xenioo Collections do not need to have any pre-defined structure. Since they are based on a Document Storage Database, you can have any field you want and can insert whatever record you wish.
What we do in our Collection Fields section is basically just tell Xenioo what are the fields we would like to see in our web view, when we access the collection and how we would like the fields to be presented, when we want to interactively create or edit a record.
So, for our answers collection what fields should we need? I would say a question_key field, that would allow us to join the answer to the trained intent question and of course, an answer_text field that will store our answer.
That should be enough for now.
Let’s add a new field by just clicking on the Add Field button.

Here is our first field. Remember: Xenioo Database collections are not bound to these fields as a table. We are just defining the fields we want to handle: we can later change them or even delete them and any data will stay in our records.
As you can see we can specify, for each of our fields a Value Edit Mode. This is great because Xenioo is capable of dynamically building an edit/insert form for us based on this information!
Since the answer may be quite long, for our next field we will choose the “Long Text” Value Edit Mode.

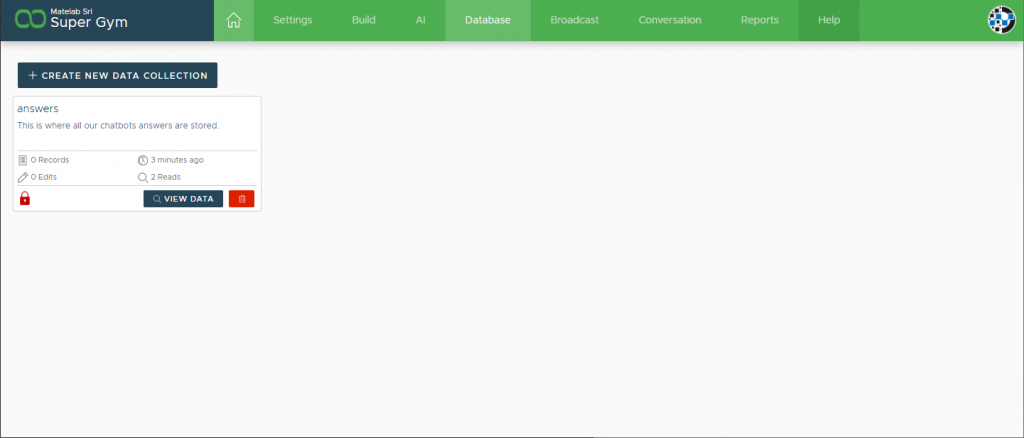
After we finished adding our second field, we can save everything and complete our very first collection. Right away, we will see the default database page change accordingly.
Filling your Q&A chatbot answers
Now we have our collection we can go ahead and click on the View Data button and access our data. See how we can immediately see our view with the fields we selected?
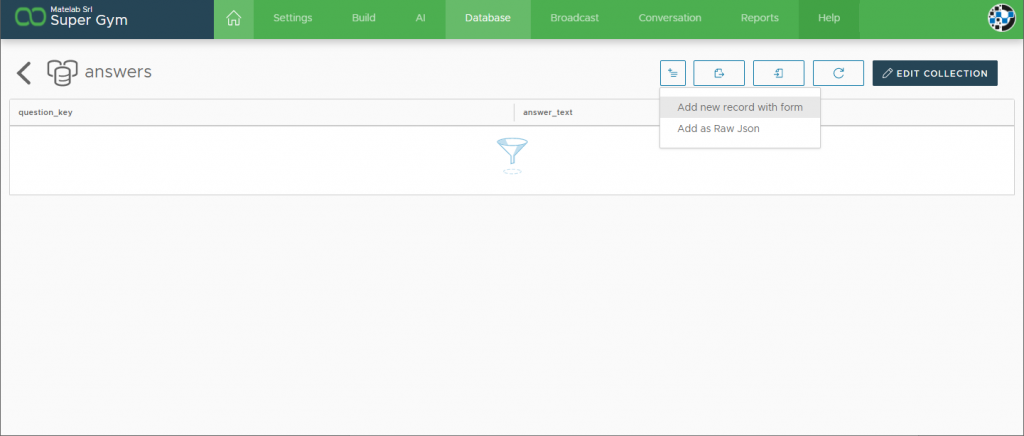
Of course, our collection is empty but we will change this right away! Let’s click on the Add Record button. We are skipping the Raw Json approach for now (we’re getting back to that in a short while!) and go straight to “Add new record with form”.

The form above has been dynamically built for us by Xenioo, based on the collection fields we’ve defined. Right away, we can notice two things:
- The form automatically displays and enforces mandatory rules, as we configured in our Collection Fields. Remember that our collections are dynamic and enforcing values applies only to this form: we can insert arbitrary JSON values in our collection.
- Xenioo automatically adds an _id field to our form. The _id field is used to uniquely identify our record and is not mandatory. If you leave it empty, a unique id will be created for you, otherwise, a new record will be created with that _id. If a record with that _id already exists, it will be overwritten.
Now that we have our answers collection and form ready, all that remains to do is, well, write some answers.
Let’s start with the Gym opening hours.

See what we are doing here? Our question_key is equal to our intent key! This means we can later relate our question to our answer!
Our imaginary gym has also a swimming pool and a specialized therapist and both have different opening hours. We’re going to add them too as different records in our collection, always using OPENING as our question_key.
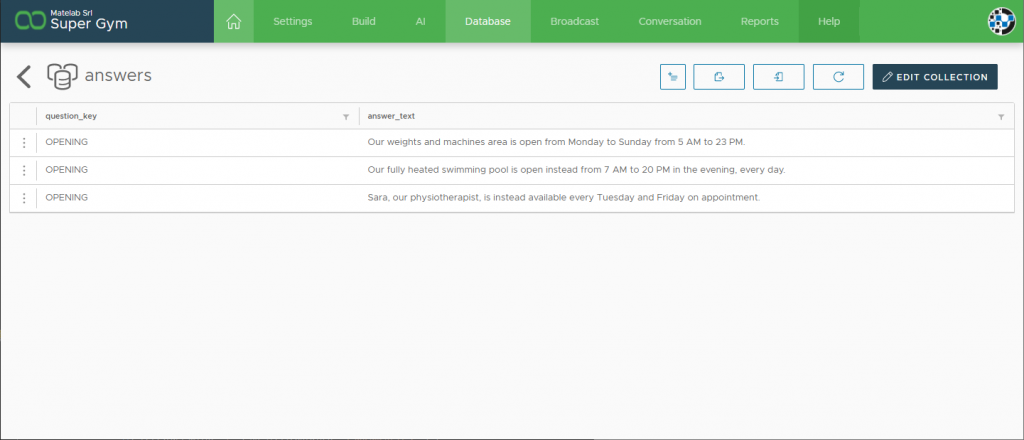
As you can see, interactively adding and editing records is as easy as using any backend you could have built by yourself, except this one didn’t need a line of code!
Under the hood
While we browse our database collections using views and tables, Xenioo manages all of the Database contents using raw JSON.
Under the hood, everything is expressed as JSON.
If you feel more familiar with standard JSON format or you feel like creating more complex record structures such as arrays of data you can always access the original collection document using the Add As Raw JSON or the Edit JSON button you find on every row.
Clicking on any of the row we have just added and choosing to edit as JSON will open the record edit dialog with a full JSON view.

You’re free to edit your records, changing the existing fields value or add any other kind of structure you may need. As long as it is a valid JSON, the data will be saved in the collection.
Improving your Q&A chatbot flow
Now we have both our questions and answers set up, we can go back to building section of our chatbot. Is time to upgrade our very simple Answer interaction.
What we did on the previous step on our collection was adding multiple records for the very same question. We did this because we wanted to show multiple bubbles to the user instead of a single big wall of text. In our flow we want to cycle on all possible answers we’ve set in the database and show a bubble for each of them.
The first thing we need to do is add a Query Collection Action to our Answer Interaction.
The Query Collection Action will execute a query on our collection based on one or more filters we can add. We just have one single filter that would be the value of the last detected intent key.
Our configured Query Collection Action will look like this:

What we are saying in this action is, basically: get data from the collection answers, where question_key equals to the current value of the last detected intent key. Note how the intent key is not explicitly set but rather referenced using Xenioo Dynamic Parsing.
An interesting thing about the Database Query Action is that, let alone, it does basically nothing. If you ever used an API Call Action or even a Firebase action, you may remember how we always somehow refer to a variable that should contain our query results.
Since Xenioo collections may potentially deal with hundreds of thousands of records, this would be impractical. What Xenioo does instead is just exposing a Move Next Action that can let you cycle on all records in a visual and intuitive fashion.
Let’s see what we’re doing in this flow, step by step:
- We are accessing our collection, filtering by our last intent key
- We are then moving to a looping interaction. Using the Move To Next Record Action, we are basically looping on all the records returned by the previous action.
- For each record, we are using the cursor_current_record variable to access specific fields on the current record. Since we’re doing a query on our answers collection to display answers we will use cursor_current_record.answer_text (the collection field we created, remember?)
- When the Move Next Record Action triggers a no more records event, we move to the Completed interaction.
The one above is the most readable version of a record loop but nothing is stopping you from doing everything in a single interaction using another great feature of Xenioo called Bookmarks:

Bookmarks are basically stop marks that can later be used to rewind the conversation flow to a specific point. In the example above we’re doing exactly the same thing but we’re always going back to the Bookmark to loop on all our records. More concise and exactly as efficient, but maybe slightly less readable.
Final Q&A chatbot question test drive
Let’s spin a new preview of our chatbot to see it in action.

How neat was that? We just created a dynamic content chatbot capable of displaying data based on free text questions. Xenioo is truly the ultimate no-code chatbot platform!
Until next time…
This is it for now. Our chatbot will be completed in our next post, where we will see how to build a dynamic carousel. Contact our personal trainer for real-time suggestions and collect our user’s feedback!
Any question about the features explained in this post? Do you want to let us help on your awesome bot idea? Be sure to get in touch with the Xenioo team at team@xenioo.com or leave a message on our Facebook Group.


