

Today we’re going to build a new Alexa Skill capable of streaming your own, personal music wherever your device is.
Too awesome? Keep reading.
The natural evolution of pure conversational chatbots is probably being transformed into fully functional voice assistants.
Alexa, Google Assistant, Duplex and other emerging technologies will seamlessly integrate into our devices and offer conversational interactions that (hopefully) mimic real human interactions.
Many have been asking us to make available this kind of integration inside Xenioo. So our team have been working around the clock to make it happen.
Now you can design and build an Alexa skill by building a Xenioo chatbot like you do with other channels.
Creating Your Alexa Developer Account
Alexa skills need to be created inside an Alexa Development Account.
Creating a development account is free and (if you want) it can be the same account you already use for buying on Amazon.
Any Skill that is under testing status is automatically distributed on all the devices associated with your development account. So it may be a good idea to use the account you’re using on all devices.
Please note that if you want to update the development state of your account on any device, you will need to unregister it and register it again like detailed in this procedure.
After you’ve set up your development account you are ready to create your first Skill. There are multiple wizards and templates that let you create multiple Skills with little to no effort but with also little to no real control.
What we are going to choose for our example is a fully custom skill.
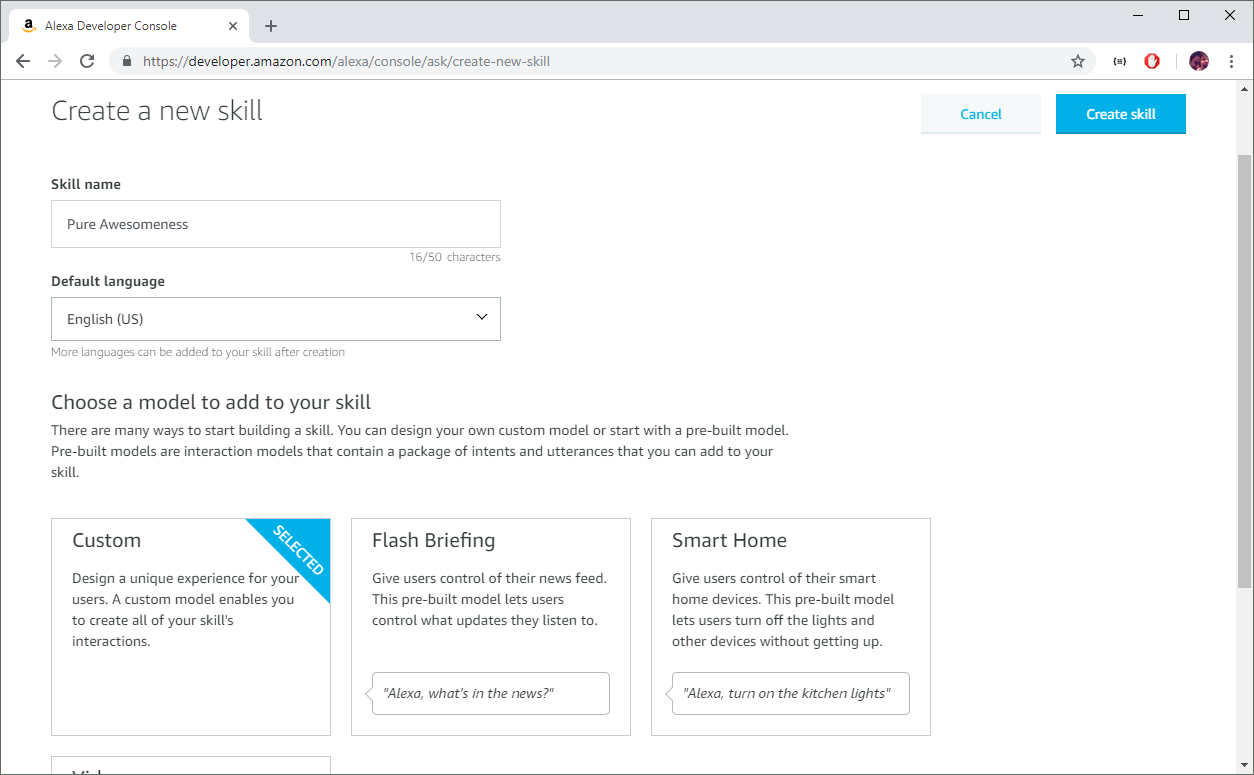
After that, we will be telling the Alexa developer console that we are going to “Start from scratch” and proceed to the Builder section.
Since we will be doing an Audio Streaming Skill, we can click on the “Interfaces” button and enable the Audio Player interface.
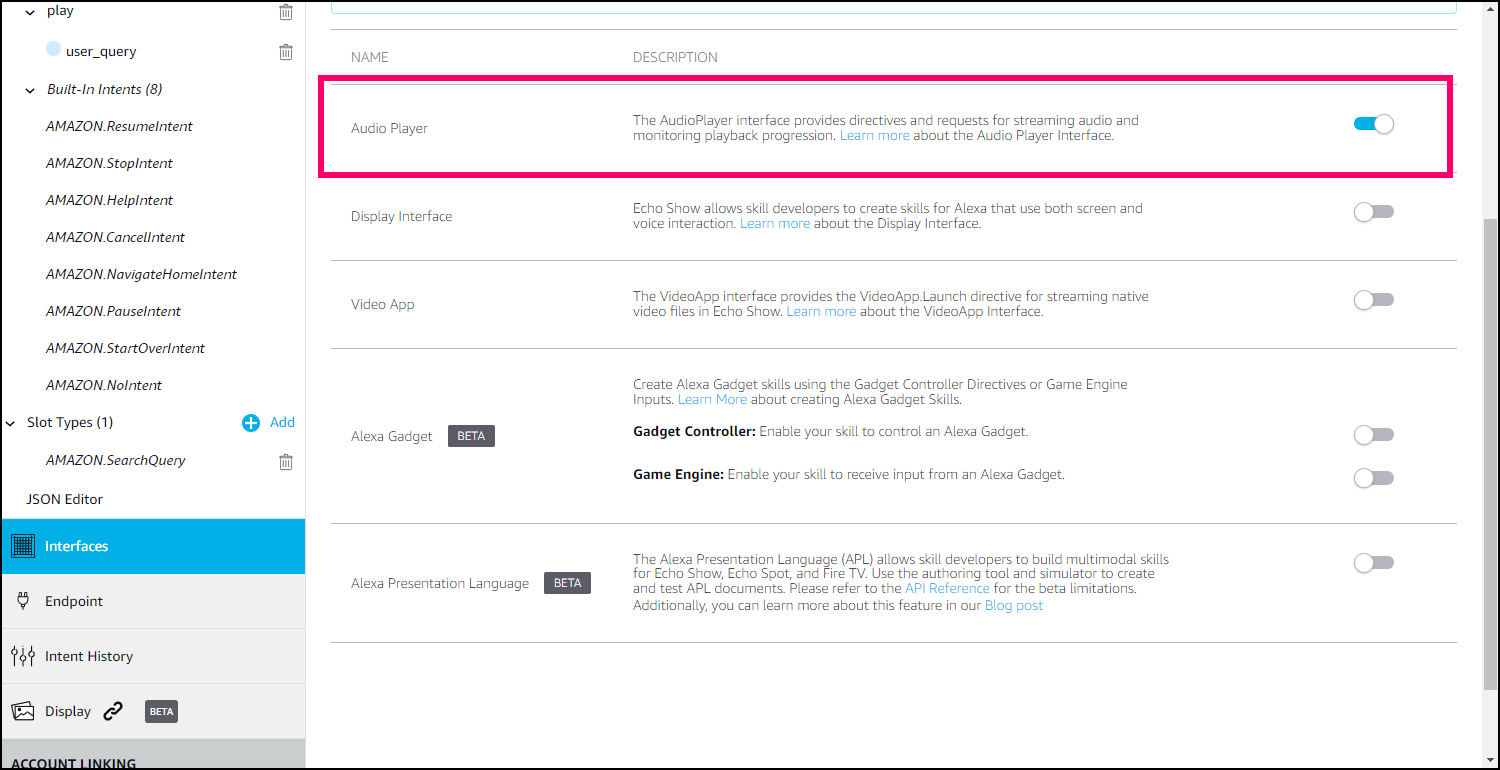
We don’t need anything more from the console right now: we can move on to the streaming setup.
Streaming Your Own Music
In our example, we don’t want to use generic and global streaming services. We want, instead, to stream our own music collection we’ve been curating and building through the years and that sits in one or more disks of our home network.
To accomplish that, we’re going to integrate Xenioo with another terrific service: Epicentric.
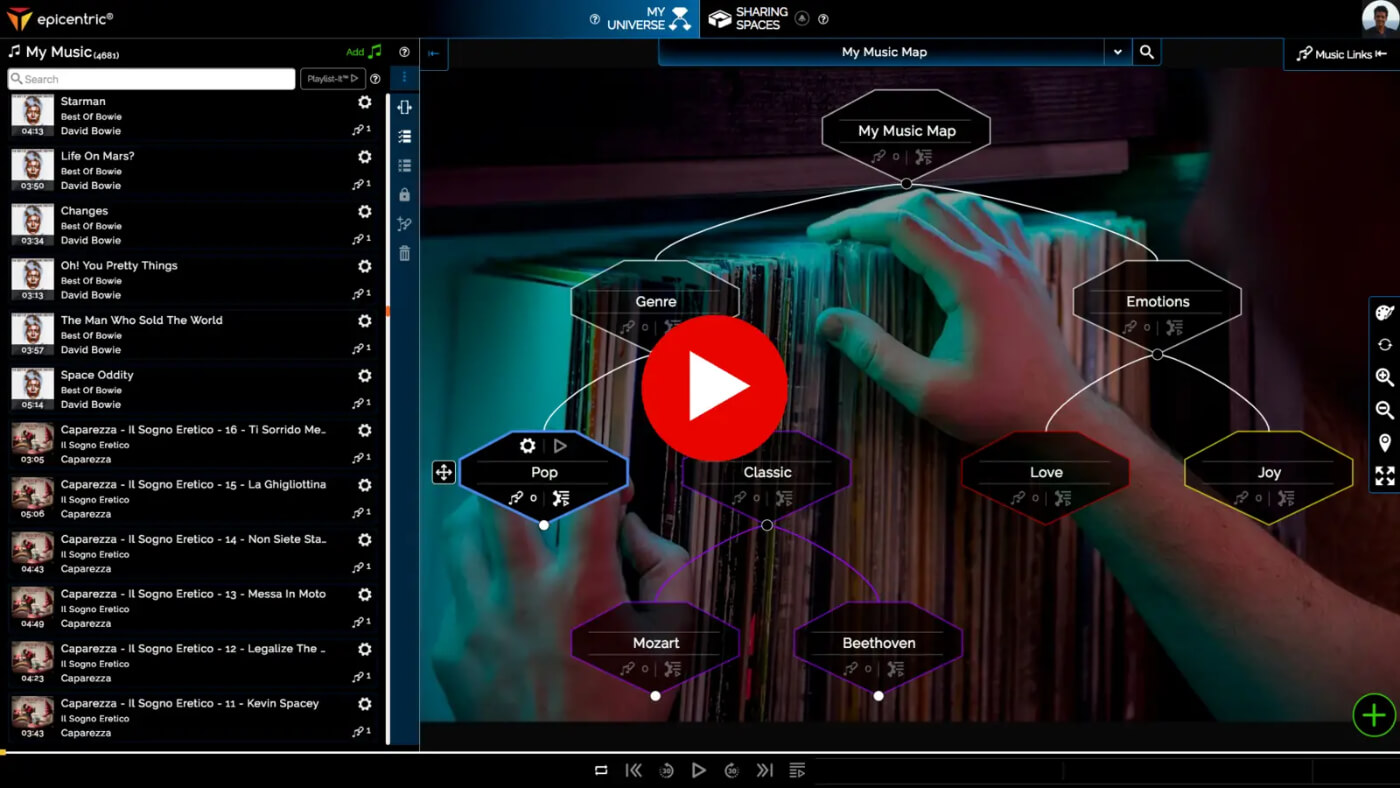
Epicentric is an incredible service that lets you upload your own music and stream it wherever you are. and allows the creation of multiple, complex playlists that are automatically managed by an AI that will make sure you are always listening to something fresh.
Just like we did with Alexa account, go ahead and signup to Epicentric. It is free and after the quick and useful walk-through, you are ready to continue with our streaming skill creation.
Conversation With Alexa
Alexa is built around the free conversational interaction concept. The conversation between the user and Alexa (and so to your chatbot) cannot have real predefined flows.
A user can say just about anything in any order and with different levels of information.
Let’s consider the exchange below:

While being extremely simple, the above example embodies the perfect exchange: the user expresses exactly what is required for the Skill to continue.
But you cannot expect everyone to interact with you like that. Mostly, in fact, are more likely to interact like this:

As you can see the user is not giving away all the info at once and our Skill is trying to fill all the information by repeating or rephrasing the question.
Your skill required information are called slots. They are pretty much like Xenioo NLP Entities and Xenioo Variables in a standard conversational chatbot.
Creating Our Voice Chatbot
With the above information in mind, we can now move on to create our Xenioo chatbot for Alexa.
It won’t be much different from creating a standard conversational chatbot. As we said, there won’t be a real step-by-step flow. We can head directly to the AI section and set up the NLP that will drive our Skill.
Inside the Xenioo AI section, we will define all the intents and expressions that will be used to create our Skill model and to define how the flow of the conversation will execute.
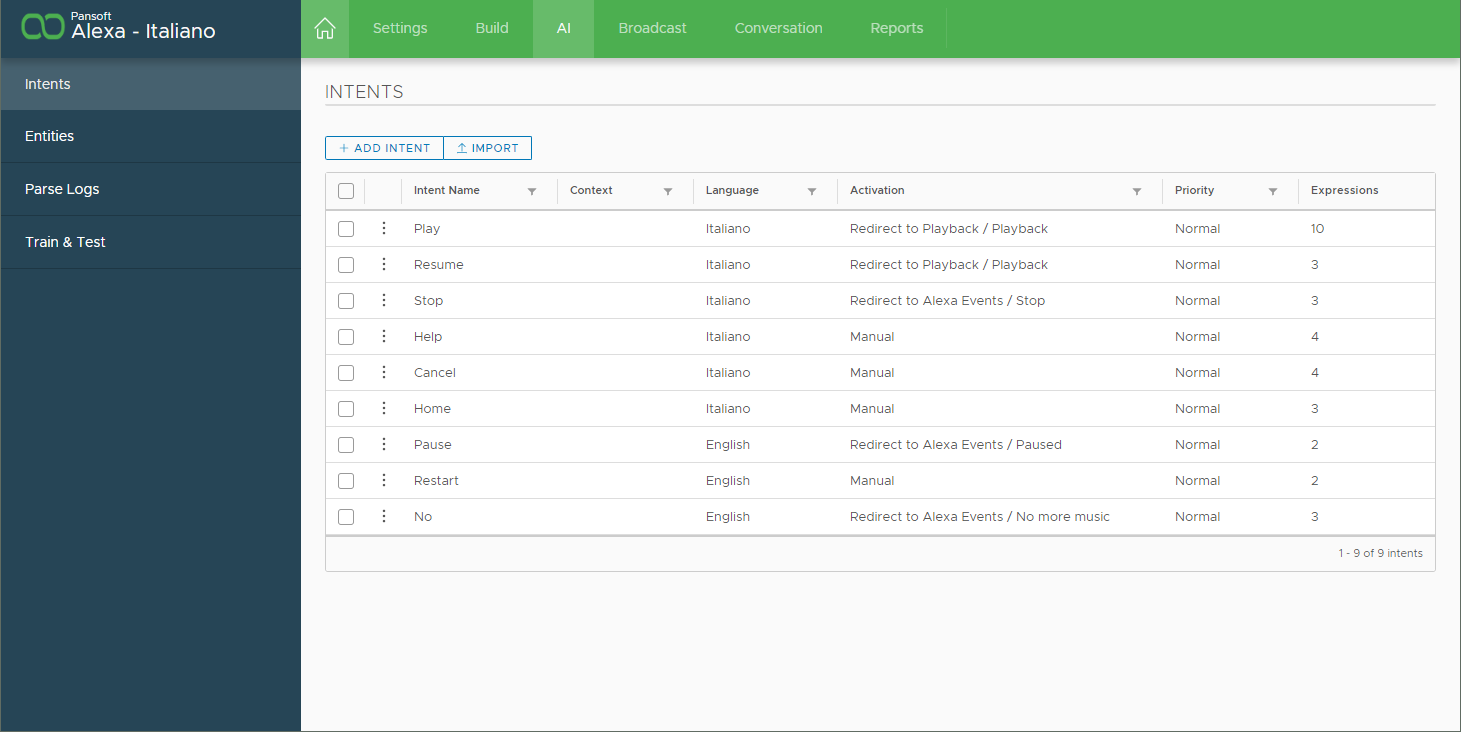
Depending on the type of Skill you are creating, you may be required to implement specific intents in your chatbot.
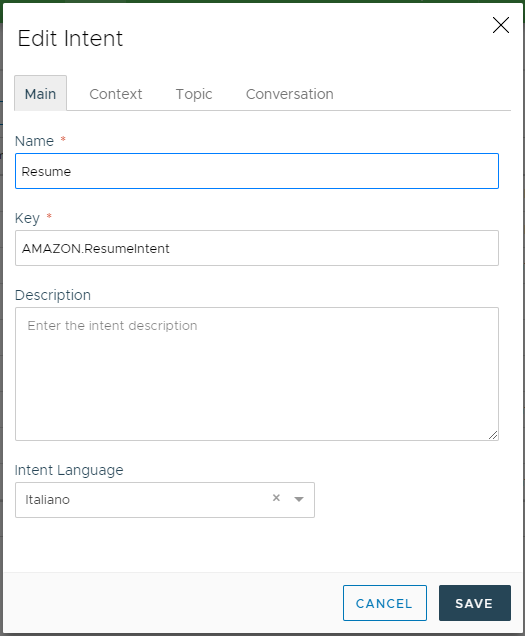
A streaming Skill like the one we’re building now is required to implement at least a Pause and Resume intent. Outside of these two, you can go on and create as many intents as you like.
Everything that is said to Alexa will be processed by the defined intents and passed to Xenioo. It will dispatch the intent redirection to your chatbot interactions. The schema below illustrates what happens behind the curtains:
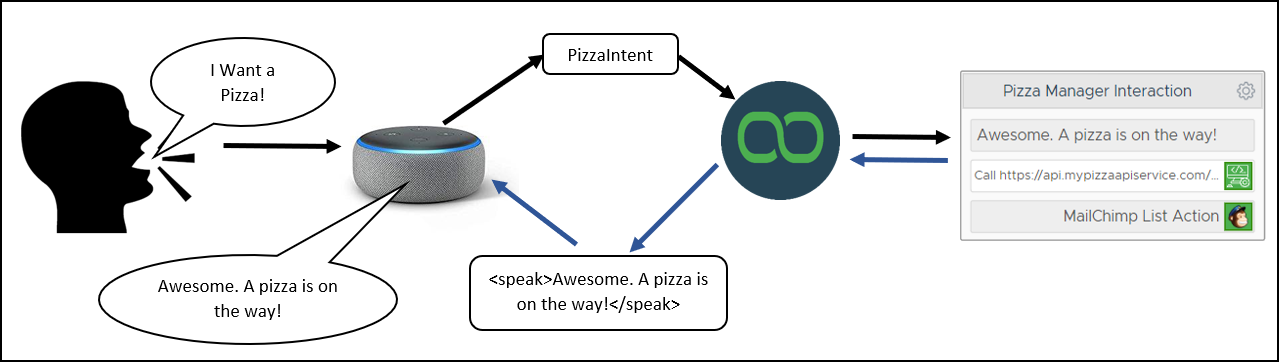
Xenioo does full use of Alexa SSML in every text that is sent back to the user. Feel free to use any lang, break, whisper or other supported tags to obtain specific voice effects.
Once you’ve created your intents, remember to connect your Activation to your chatbot interactions.
Since everything the user says will trigger an existing intent, only intents that are connected to an existing chatbot interaction will be deployed to your skill model. Also, if you want to implement or override existing Alexa skills (like the resume or pause we are required to do) remember to specify the Alexa skill key in your intent skill key.
First Deploy Of Alexa Chatbot
We’re looking forward to deploying our very first Skill for a test drive. Before fully completing our chatbot we want to push our first work!
We can do it anytime by just clicking on the Publish button inside our Build section. In the channel selection screen let’s select Alexa and a default Amazon login window will open. This window will connect your Amazon profile and allow Xenioo to push Alexa skills for you.
After confirming your account and confirming all required permissions, we can continue configuring our skill deployment.
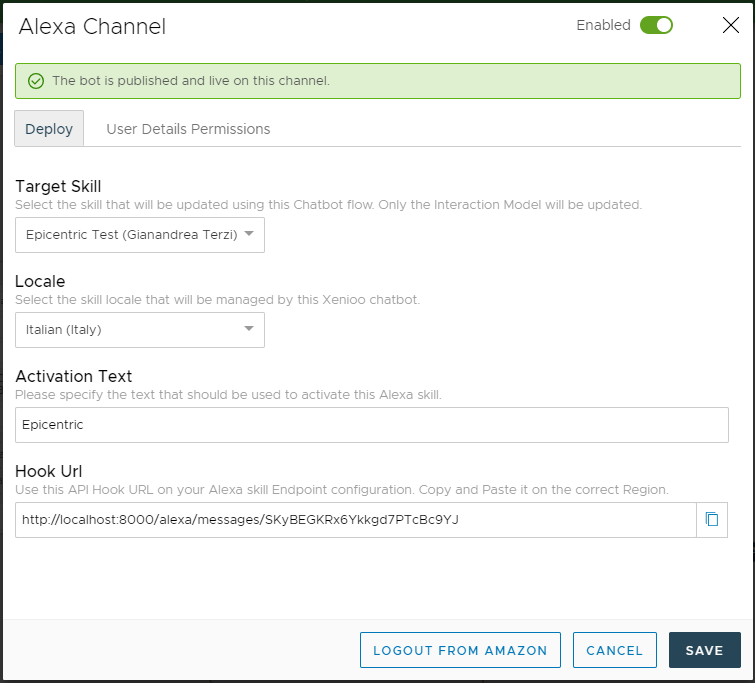
In the above window, you are required to select the skill you’re publishing, the locale and the activation text you like.
The activation text will be used by Alexa to activate your skill so be sure to pick something which is both easy to say and not clashing with default Alexa phrases.
The most important setting here is the Hook Url. Be sure to copy this URL and paste it to your Alexa skill configured endpoints.
Note that Xenioo will only update and build your Invocation Model as that is the key to Alexa Skill inner workings.
Xenioo does not wish to overwrite any setting you have specified in your Alexa skill and that you may change later. So let you decide whatever is your desired configuration from the native Alexa console.
Xenioo is the perfect backend middleware and AI-driven flow platform for your Skill and it does exactly that awesomely.
Once you’re done configuring everything press publish and your Skill is ready to be tested live!
In our next post, we will see how Streaming, Account Linking, and Device State management works!