
This time, after having managed to ask our user’s email address, we will display media content in our chat.
Xenioo Actions currently support every kind of media attachment possible, and in this
You can follow our lesson directly from the video below. At the end of the post you will find a Xenioo bot file that simply restores the example bot into your account for playback and testing. Let’s start!

Using Media Actions
First of all, let’s create a brand new chatbot. As always, Xenioo will create a blank Behavior and a simple Interaction with just a text action.
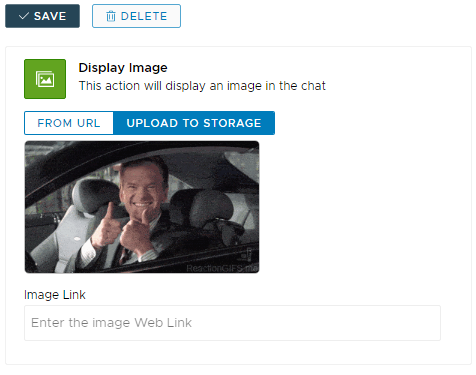
We don’t need any text action this time, so let’s just delete it. We now have an empty interaction that we can use. So select the interaction, and add a new action: the action we need this time is an Image Action and you can find it under the “Content” tab of the Available Actions dialog.
Once the Action has been added, you may notice two options: “From Url” or “Upload To Storage”.
These two options are common on every media or resource-related content and allow you to choose how you would like to add content to your bot.
If you have an external resource, like an image Url, you can click on the “From Url” button and specify it in the textbox that appears. If instead, you wish to upload it to Xenioo servers, you can select “Upload To Storage” and upload it directly from your local drive
In our example, we will be uploading an image directly from our drives. Supported image formats are GIF, JPG and PNG.
Depending on the size, Xenioo may need to resize the image to fit the chat window size.
As you can see, Xenioo will display the media content directly in the designer area.
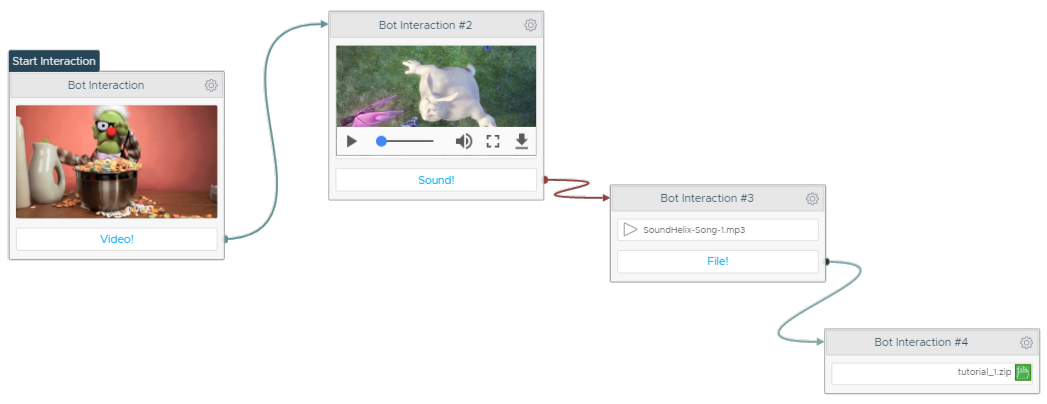
Now let’s create a new Interaction and add a Video Action. Video Actions are similar to Image Actions, but as the name suggests, they are meant for displaying videos.
Like images, videos can be selected from an URL or from your local storage.
Once you’ve created a Video Action, you may want to add an Audio Action that will display a standard sound player widget in the user chat or a File Action that will allow the user to download a file.
Local Storage or Url
As you’ve seen, in all these actions you can choose to upload your content from your local drive or choose to attach it from an Url.
The second option does not download the file to Xenioo servers. Instead, the link you’ve provided will be used when running the chat. If you later change the content on the source Url, it will also change in the Xenioo chat window.
Xenioo storage may be limited (or not available) depending on your active Xenioo subscription. If storage is not available, the “Upload To Storage” option will be disabled.
Building for Facebook
If you’re specifically targeting Facebook when creating your bot with Xenioo there a two things to keep in mind:
- Facebook treats media files and downloadable files as chat ‘attachments’. These files are uploaded to Facebook servers every time the chat has to display them.
These files will remain as resources in the user chat and will not be dynamic, like in the webchat. - The limit for any kind of attachment is 2MB. You may circumvent this limit on Xenioo webchat by using an external Url, but when switching to Facebook chat, these elements will simply not appear in the user chat.
Wrapping up
In this
As with all our lessons, you can find the chatbot sample in your Xenioo account so that you can import it to further experiment and learn.